Showing posts with label cupcakes. Show all posts

Monday, 4 August 2014

Rhubarb and custard cupcakes

3 Rhubarb and custard flavoured cupcakes iced to look like tennis balls


Having recently moved my rhubarb into a new position, it has gone crazy! So, as the Wimbledon Ladies’ Final finished disappointing quickly, I had lots of time to try out lots of new recipes to use up my rhubarb!

Having decided to try out a rhubarb and lemon cake, I fancied making something with a Wimbledon theme and so decided on some tennis ball cupcakes. If I were making these for something special, I’d probably have made some more appropriate strawberry and cream flavoured cakes, or maybe even some Pimms flavoured cakes, but as they were just for fun, and I needed to make use of my rhubarb glut, I decided on rhubarb and custard flavoured cupcakes. These also gave me the opportunity to try out my new flavourings from Lakeland.

I followed my standard vanilla cupcake recipe, replacing the vanilla extract with 18 drops of the rhubarb flavouring and filling the cupcakes with rhubarb compote. I replaced the vanilla extract in the buttercream with 15 drops of custard flavouring. The rhubarb flavour did come through gently in the cakes but I think that it could have done with a bit more – I have suggested 20 drops in the recipe below. I’m not completely convinced by the custard flavour – I’m not sure that the custard taste really came through the buttercream – it didn’t taste particularly different to standard vanilla buttercream. I’ll have to try out the flavouring in something else to test this out.

Overall though, I did enjoy these cakes. I wasn’t sure that the grass nozzle (mine came in a set from Lakeland that is incredibly useful!) would give the right effect for the tennis balls, but it worked out pretty well. The cakes tasted good and the slightly sour rhubarb compote was balanced well by the sweet custard buttercream. Will definitely make these again.


Rhubarb and custard cupcakes

Ingredients
  1. 110g butter, at room temperature
  2. 225g golden castor sugar
  3. 2 large eggs
  4. 150g self-raising flour, sifted
  5. 125g plain flour, sifted
  6. 120ml semi-skimmed milk, at room temperature
  7. 20 drops rhubarb flavouring
  8. 300g rhubarb
  9. 1-2 tblsp soft brown sugar

Buttercream:
  1. 110g butter, at room temperature and very soft
  2. 500g icing sugar, sifted
  3. 15 drops custard flavouring
  4. 60ml milk
  5. Green and yellow paste food colouring
  6. 100g icing sugar

Method
  1. Preheat oven to 160C.
  2. Line a 12 hole muffin tin with cupcake cases.
  3. In a large mixing bowl, cream the butter and sugar until light and fluffy this will take at least 5 minutes with an electric hand mixer – don’t rush this stage).
  4. Whisk the eggs together in a small bowl.
  5. Add the eggs to the butter and sugar mixture, a bit at a time, mixing for a few minutes after each addition. It should result in a lovely light mousse-like mixture.
  6. Combine the two flours in a separate bowl.
  7. Combine the milk and rhubarb flavouring in a jug.
  8. Add one third of the flours to the creamed mixture and stir gently to combine.
  9. Pour in one third of the milk mixture and stir gently.
  10. Continue to add flours and then milk mixture alternately, stirring gently after each addition, until all have been added.
  11. Spoon mixture into the cupcake cases, filling to about 2/3 full (or about 65g each).
  12. Bake in the oven for about 30 minutes until lightly golden brown. The cakes will spring back lightly when touched, if cooked.
  13. Remove from the oven and leave to cool in tin for about 10 minutes, before carefully placing on a wire rack to finish cooling.

While the cakes are in the oven:
  1. In a large mixing bowl, beat the butter, milk, vanilla extract and half of the icing sugar until smooth.
  2. Add the rest of the icing sugar and beat until smooth and creamy.
  3. Add the green and yellow food colouring until you reach the desired colour.
  4. Put buttercream into a piping bag with a large grass nozzle.
  5. Chop the rhubarb into approx. 2cm slices.
  6. Place in a small saucepan with a splash of water and 1 tblsp soft brown sugar.
  7. Heat gently until the rhubarb is soft.
  8. Strain off any juices through a sieve
  9. Mash the rhubarb gently and add extra soft brown sugar if needed. 

Once cakes are cooked and cooled:
  1. Use a tea spoon to cut a cone out from the centre of the cakes.
  2. Cut the top disk off each cone and retain.
  3. Fill the hole in each cake with a teaspoon of the prepared rhubarb and then replace a cake disk onto each cake to seal the hole.
  4. Pipe short grass-like spikes onto each cupcake until covered.
  5. Leave to firm.
  6. Mix the icing sugar with a small amount of water until it reaches a toothpaste-like consistency.
  7. Place this icing into a piping bag with a small round nozzle.
  8. Use a rounded knife to gently draw on the curves of the tennis ball onto each cupcake.
  9. Pipe over these curves with the white icing.


Tuesday, 8 July 2014

Carrot cupcakes with orange buttercream

11 carrot cupcakes topped with a swirl of orange buttercream

It’s been a busy couple of months with lots of friends and family visiting! I made these carrot cupcakes about a month ago, when some friends were visiting on their way down from Leeds to Cornwall. I fancied making these as I haven’t made them for ages – they are a fairly quick and easy cake to make but they taste delicious.

The recipe comes from my “go to” Cupcakes from the Primrose Bakery book. I’ve made them before and they work brilliantly well with the orange cream cheese icing in the book, however, they then need to be kept in the fridge. As my friends were travelling onwards, I wanted to give them some for their holiday and so I stuck with a simple orange buttercream and a sprinkle of cinnamon.

The recipe is simple and these are a very reliable bake. The mixture is a lot runnier than most cake mixtures, but don’t be alarmed by this. If you have time before you start baking, soak the raisins in a mixture of boiling water, orange juice and a bit of cinnamon and they will plump up beautifully.  The recipe calls for 130g raisins, but I usually chuck a few more in.

Carrot cupcakes with orange buttercream

Ingredients
    Carrot cupcake with a swirl of orange buttercream
  1. 225g carrots, peeled and trimmed
  2. 130g raisins
  3. 2 large eggs
  4. 130g caster sugar
  5. 120ml corn oil
  6. ½ tsp vanilla extract
  7. Grated zest of 1 orange
  8. 120g plain flour
  9. 1 tsp bicarbonate of soda
  10. Pinch of salt
  11. 1 tsp ground cinnamon

Orange buttercream
  1. 115g butter, at room temperature
  2. 500g icing sugar, sifted
  3. 4 tblsp freshly squeezed orange juice

Method
  1. Pre-heat the oven to 160C.
  2. Line a 12 hole muffin tin with cupcake cases.
  3. Finely grate the carrots and drain off any liquid.
  4. Combine the grated carrot with the raisins in a large bowl and set to one side.
  5. Using a stand mixer, beat the eggs and sugar together for several minutes.
  6. Add the oil, vanilla and orange zest and beat well.
  7. Sift the flour, bicarbonate of soda, salt and cinnamon together in another bowl.
  8. Gradually add these ingredients to the egg and sugar mixture, folding carefully after each addition.
  9. Pour this mixture into the bowl containing the carrots and raisins and mix with a wooden spoon until evenly distributed.
  10. Carefully spoon the mixture into the cupcake cases, filling them to about two-thirds full.
  11. Bake in the oven for about 25 minutes, until the cakes bounce back when touched.
  12. Remove from the oven and leave the cakes in the tin for about ten minutes before placing on a wire rack to cool.
  13. To make the buttercream, beat the butter, juice and half of the icing sugar until smooth.
  14. Add the rest of the icing sugar and beat until smooth and creamy.
  15. Spoon the buttercream into a piping bag topped with a Wilton 1M piping nozzle.
  16. Once the cakes have cooled, pipe a swirl of buttercream onto the cakes and top with a sprinkle of cinnamon. 


Friday, 27 June 2014

Earl Grey cupcakes with lemon buttercream

12 Earl Grey cupcakes topped with lemon buttercream and decorated with a garden theme

Delicious Earl Grey cupcakes with a subtle lemon buttercream, decorated with a country garden theme.

My manager retired earlier this month and so her leaving party was definitely an opportunity for some special, extra-effort cupcakes. I had to make a Sticky Ginger Cake, as this is my signature bake at work and much loved by my manager. To accompany this, I decided to make Primrose Bakery’s Earl Grey cupcakes, as she is a big fan of Earl Grey tea. The following recipe is my version of these cupcakes – I have made them in the past and found that the tea flavour was rather faint, so I added in an extra tea bag to give them a bit more oomph!

The PB book suggests vanilla buttercream, but I decided to go for a lemon buttercream to give a bit of gentle zing to the cakes – and I feel that lemon works really well with the tea flavour. The lemon buttercream recipe below is a bit more subtle than the one I generally use – as I didn’t want to overwhelm the tea flavour, so I added a bit of milk rather than all lemon juice to the mix.

As my manager is a keen gardener, I decided on a gardening theme. I flicked through Pinterest for some inspiration and then sketched out my design. I decided on the simple dirt path, as this seemed much simpler and quicker than making paving stones as I did on my Magic Garden set of cupcakes. I had some Lakeland citrus sugar, a bit like this one, that I used to scatter on the paths, but they don’t appear to sell it anymore, so I have suggested just using a mix of brown sugars instead. For the grass, you will need a grass piping nozzle that looks something like the one pictured. Mine came in a set from Lakeland that is incredibly useful! 


You can save time on the day by making the fondant flowers, leaves and other decorative items in advance. To make the cauliflower and cabbages, I used a 5 petal flower cutter like that pictured. However, don’t buy cutters like this separately, there are some fantastic deals for plunger cutter sets on Amazon or Ebay. You don’t need to add the tiny butterflies, but I had a tub of butterfly sprinkles in the cupboard and I think that they add a lovely touch.

I was really pleased with how these cakes turned out. They did take quite a bit of effort, but I think that they were worth it! The tea flavour came through well and worked nicely with the subtle lemon buttercream. I was a bit disappointed that the Bergamot flavour of the Earl Grey tea did not come through as strongly as I might have hoped. I’m not sure how to intensify this without over-doing the tea flavour – Google does not seem to give me any answers! I can’t seem to find a bergamot flavouring and I’m not sure about adding pure essential oil to cakes! I used Twinings Earl Grey teabags, but I may try an alternative next time – perhaps even using tea leaves rather than tea bags.

Earl Grey cupcakes with lemon buttercream
(single batch of 12 cupcakes)

Earl Grey cupcake decorated with a garden path and flower potIngredients
  1. 175ml semi-skimmed milk, at room temperature
  2. 5 Earl Grey tea bags
  3. 110g butter, at room temperature
  4. 225g golden castor sugar
  5. 2 large eggs, beaten
  6. 125g self-raising flour, sifted
  7. 120g plain flour, sifted
Buttercream:
  1. 110g butter, at room temperature
  2. 20ml milk, at room temperature
  3. 40ml freshly squeezed lemon juice
  4. 500g icing sugar, sifted
Method
    Earl Grey cupcake decorated with a garden path and wellies
  1. Heat 125ml milk in a saucepan over a medium heat until it just begins to boil.
  2. Remove from the heat and add the tea bags.
  3. Cover with clingfilm and leave to infuse for about 30 minutes.
  4. Discard the tea bags and add the extra 50ml of milk.  
  5. Preheat oven to 160C.
  6. Line a 12 hole muffin tin with cupcake cases.
  7. In a large mixing bowl, cream the butter and sugar until light and fluffy (this will take at least 5 minutes with an electric hand mixer – don’t rush this stage).
  8. Add the beaten eggs, a little at a time, mixing for a few minutes after each addition. It should result in a lovely light mousse-like mixture.
  9. Combine the plain flour with the self-raising flour and all of the spices in a separate bowl.
  10. Add one third of the flours to the creamed mixture and stir gently to combine.
  11. Pour in one third of the infused milk and stir gently.
  12. Continue to add flours and then milk mixture alternately, stirring gently after each addition, until all have been added.
  13. Spoon mixture into the cupcake cases, filling to about 2/3 full.
  14. Bake in the oven for about 30 minutes until lightly golden brown. The cakes will spring back lightly when touched, if cooked.
  15. Remove from the oven and leave to cool in tin for about 10 minutes, before carefully placing on a wire rack to finish cooling. 

While the cakes are in the oven, make up the buttercream:
  1. In a large mixing bowl, beat the butter, milk, lemon juice and half of the icing sugar until smooth.
  2. Add the rest of the icing sugar and beat until smooth and creamy.
To decorate
  1. Food colouring (preferably pastes rather than liquids)
  2. Golden caster sugar / Demerara sugar
  3. Ready-to-roll fondant icing – various colours, including green
  4. Butterfly sprinkles
  5. Writing icing
Method
    Earl Grey cupcake decorated with carrots growing in a vegetable patch
  1. Use plunger cutters to create flowers and leaves and set aside to dry (this can be done several days in advance).
  2. Mould additional decorative items, such as wellies, flower pots and vegetables out of fondant icing (see above for tips on cauliflowers and cabbages). (Again, this can be done in advance)
  3. Use writing icing to add centre to the flowers
  4. Remove ¼ of the buttercream from the bowl and colour this brown.
  5. Colour the remaining buttercream green.
  6. Use a palette knife to spread the brown buttercream onto some of the cupcakes as a vegetable patch and as a path.
  7. Sprinkle a mix of golden and Demerara sugar onto the paths.
  8. Place green buttercream in a piping bag with a grass nozzle attached.
  9. Pipe grass around the vegetable patches, on either side of the paths and onto the remaining cupcakes.
  10. Add flowers, vegetables and other items onto the cupcakes.  
Earl Grey cupcake decorated with a caulliflower growing in a vegetable patch


Monday, 26 May 2014

Peppa Pig cupcakes

6 Peppa Pig cupcakes - 2 Peppa Pig, 2 suns and 2 clouds with the number 4

My friend’s little girl is obsessed with Peppa Pig! So, for her fourth birthday, the whole family travelled over from Guernsey for a holiday on “the Mainland” culminating in a two-day visit to Peppa Pig World. First though, they visited us here in Bath, so I decided to make some Peppa Pig cupcakes (and, as my rhubarb in the garden was ripe for picking, some rhubarb crumble muffins) to welcome them!

I had a quick flick through Pinterest for some inspiration and as I didn’t have loads of time, I decided to keep it reasonably simple: decorating 6 cupcakes with the Peppa theme and 6 with a simple pink rose swirl.

I made the Peppa cupcake toppers the night before making the cakes: this allows the icing to dry and firm and means that it is less likely to absorb the moisture from the buttercream and go floppy! Getting the right thickness is difficult – mine were too thick! I’d probably aim for about 1-2mm thick. For the images on top, I used cutters from this set

Tin of fondant cuttersThis set is fantastic! I have a rather huge collection of fondant cutters and plunger cutters, but this set is the one that I use time and time again! I don’t have a set of number cutters (must buy some!) so I cut the number fours from a triangle of icing.

As the cakes were for a four-year-old, I decided to go for a very simple vanilla cupcake, filled with raspberry jam to liven them up and help them last a bit longer. Adding a filling like jam to cupcakes not only boosts the flavour, but it also helps to increase the life of the cakes: as the cakes age, they tend to dry out a bit and so the jam adds moisture.

The final result: well, the Birthday girl loved them (and so did her mum!), which was the main thing! For me, they weren’t the best thing that I have ever made – the red outline on Peppa doesn’t quite work right – it should be pink (but I don’t have a pink food colour pen!) and the blue disks were way too thick! However, the cake was light and fluffy and tasted good – which is the main thing!  

Vanilla cupcakes with raspberry jam and vanilla buttercream
Ingredients
    6 Peppa Pig cupcakes - 3 with Peppa Pig cupcake toppers and 3 with rose swirl of buttercream
  1. 110g butter, at room temperature
  2. 225g golden castor sugar
  3. 2 large eggs
  4. 150g self-raising flour, sifted
  5. 125g plain flour, sifted
  6. 120ml semi-skimmed milk
  7. 1 tsp vanilla extract
  8. 4 tblsp raspberry jam
Buttercream:
  1. 110g butter, at room temperature and very soft
  2. 500g icing sugar, sifted
  3. 1 tsp vanilla extract
  4. 60ml milk 
  5. Pink paste food colouring
Method
  1. Preheat oven to 160C/350F/GM4.
  2. Line a 12 hole muffin tin with cupcake cases.
  3. In a large mixing bowl, cream the butter and sugar until light and fluffy this will take at least 5 minutes with an electric hand mixer – don’t rush this stage).
  4. Add the eggs, one at a time, mixing for a few minutes after each addition. It should result in a lovely light mousse-like mixture.
  5. Combine the two flours in a separate bowl.
  6. Combine the milk and vanilla extract in a jug.
  7. Add one third of the flours to the creamed mixture and stir gently to combine.
  8. Pour in one third of the milk mixture and stir gently.
  9. Continue to add flours and then milk mixture alternately, stirring gently after each addition, until all have been added.
  10. Spoon mixture into the cupcake cases, filling to about 2/3 full.
  11. Bake in the oven for about 30 minutes until lightly golden brown. The cakes will spring back lightly when touched, if cooked.
  12. Remove from the oven and leave to cool in tin for about 10 minutes, before carefully placing on a wire rack to finish cooling.
While the cakes are in the oven, make up the buttercream:
  1. In a large mixing bowl, beat the butter, milk, vanilla extract and half of the icing sugar until smooth.
  2. Add the rest of the icing sugar and beat until smooth and creamy.
  3. Put buttercream into a piping bag with a large star nozzle.
Once cakes are cooked and cooled:
  1. Use a tea spoon to cut a cone out from the centre of the cakes.
  2. Cut the top disk off each cone and retain.
  3. Fill the hole in each cake with a teaspoon of raspberry jam and then replace a cake disk onto each cake to seal the hole.
  4. Pipe rose swirls onto all of the cupcakes.
  5. Top cakes with a Peppa disk.


Peppa-themed cupcake toppers
  1. Pale blue, yellow, pink, red and white fondant icing
  2. Black writing icing / black food colour pen
  3. Red food colouring
  4. Pink food colour pen

Method
  1. Roll out the blue fondant icing to 1-2mm thick and cut out 6 circles with a 75mm round cutter.

For the sun cupcakes:
  1. Roll out the yellow fondant to about 1mm thick
  2. Cut out two 25mm circles and 16 small rectangles.
  3. Use a paintbrush and a very small amount of tap water to stick the suns to the blue disks.

For the cloud cupcakes:
  1. Roll out the white fondant to 2-3mm thick.
  2. Cut out two flowers and then carefully roll over each flower in one direction with a rolling pin.
  3. Use a number or a letter cutter to cut out an age or initial.
  4. Use a paintbrush and a very small amount of tap water to stick the clouds to the blue disks and then the numbers to the clouds.

For the Peppa cupcakes:
1 Peppa Pig cupcake
  1. Roll out red fondant to about 1mm thick.
  2. Cut out two triangles.
  3. Use a circle cutter to cut off one corner (to sit the head on) and to round off the opposite edge of the triangle (to sit against the side of the blue disk).
  4. Repeat for the second triangle
  5. Roll out pink fondant to 1mm thick.
  6. Cut out two ellipses.
  7. Use a knife to turn the ellipses into Peppa heads (whistle-shaped!)
  8. Use a paintbrush and a very small amount of tap water to stick the red dress shapes to the blue disks and then stick on the Peppa heads in the correct position.
  9. Roll four very small balls of pink fondant and flatten each slightly.
  10. Stick these flattened balls in place as ears.
  11. Roll very thin sausages of pink fondant and then stick in place as arms.
  12. Use the pink food colour pen to outline Peppa’s head and ears, and define the nose, nostrils and mouth.
  13. Add eyes with the black food colour pen.
  14. Dilute a tiny amount of red food colouring in a tiny amount of water.
  15. Using a paintbrush, use this diluted food colouring to paint on Peppa’s flushed cheeks.  


Tuesday, 29 April 2014

Sheep cupcakes (apple and cinnamon)


12 Sheep cupcakes - cinnamon cupcakes filled with apple puree and topped with maple syrup buttercream and mini marshmallows

Bake number two for the Welsh hen do! Having done a quick skim through Pinterest for Welsh-themed cupcakes, I decided that marshmallow-topped sheep cupcakes were definitely the way forward!

Having chosen lemon and blueberry mini loaf cakes as my other bake, I decided to make apple and cinnamon  flavoured cupcakes, using some apple puree left in the freezer from last Autumn’s glut of Bramley apples. I made apple and cinnamon cupcakes about a year ago, but the texture of the cakes didn’t turn out quite right (although they tasted fab!). This time, I decided to make cinnamon cupcakes and fill them with apple purée. The cinnamon cupcakes were an adaptation of the Primrose Bakery vanilla cupcakes –simply with the addition of two teaspoons of cinnamon. I added a teaspoon of vanilla extract as this helps to soften the cinnamon and give a more rounded flavour. The apple puree was added to the cooked cupcakes as a filling. I’ve recently discovered the joy of American pancakes with maple syrup and, inspired by these, decided to make a maple syrup buttercream to top these cupcakes.

To create the sheep, I made the black sheep heads out of fondant icing the night before making the cakes. This takes quite a while so it is better done in advance. However, having made them all in advance – I managed to lose one! I didn’t have the time or inclination to make another, but fortunately, EHH came to the rescue with a fab suggestion – I rolled four small thin sausages of black fondant and turned them into feet – creating an upside-down sheep!  Pushing the marshmallows into the buttercream was easy but took longer than expected – so allow plenty of time!

Once complete, I was fairly happy with these cupcakes – they tasted great and looked pretty good! The bride-to-be loved them too! The maple buttercream worked really well with the apple and cinnamon – definitely a good combination!

Cinnamon cupcakes with apple purée and maple syrup buttercream
12 Sheep cupcakes - cinnamon cupcakes filled with apple puree and topped with maple syrup buttercream and mini marshmallows

Ingredients
  1. 110g butter, at room temperature
  2. 225g golden castor sugar
  3. 2 large eggs
  4. 150g self-raising flour, sifted
  5. 125g plain flour, sifted
  6. 120ml semi-skimmed milk
  7. 2 tsp cinnamon
  8. 1 tsp vanilla extract
  9. 2 large / 3 small Bramley apples
  10. ½ - 1 tblsp soft brown sugar
Buttercream:
  1. 115g butter, at room temperature
  2. 500g icing sugar, sifted
  3. 2 tblsp maple syrup
  4. 2 tblsp milk 

To decorate
  1. Mini marshmallows
  2. Black fondant icing
  3. White fondant icing
  4. Black writing icing (optional)

To make the sheep heads:
(These can be made ahead of time and stored in a cool dry place until they are needed).
  1. Knead the black fondant until pliable.
  2. Make 12 teardrop shaped lumps of icing (approximately the size of the top segment of your index finger)
  3. Use a small ball tool to make indents on either side of the rounded end of each teardrop.
  4. Use the same tool to make indents for the eyes.
  5. Roll 24 small lumps of black fondant for the ears.
  6. Roll 24 small balls of white fondant for the eyes.
  7. Use a paintbrush to dampen the indents with water.
  8. Push the eyes and ears into place.
  9. Use the writing icing (or tiny balls of black fondant – but this will be very fiddly!) to add pupils to each eye. 
  10. Use a skewer to add two nostrils to each head.
  11. Set aside to dry.

For the cakes:
  1. Peel and chop the Bramley apples.
  2. Place the chopped apples in a saucepan with two tablespoons of water and half a tablespoon of soft brown sugar.
  3. Cook over a low heat until softened and mostly pureed ( a few small lumps is fine).
  4. Taste and add extra brown sugar as required.
  5. Place to one side to cool.
  6. Preheat oven to 160C.
  7. Line a 12 hole muffin tin with cupcake cases.
  8. In a large mixing bowl, cream the butter and sugar until light and fluffy (this will take at least 5 minutes with an electric hand /stand mixer – don’t rush this stage).
  9. Add the eggs, one at a time, mixing for a few minutes after each addition. It should result in a lovely light mousse-like mixture.
  10. Combine the two flours and the cinnamon in a separate bowl.
  11. Combine the milk and vanilla extract in a jug.
  12. Add one third of the flour mixture to the creamed mixture and stir gently to combine.
  13. Pour in one third of the milk mixture and stir gently.
  14. Continue to add flours and then milk mixture alternately, stirring gently after each addition, until all have been added.
  15. Spoon mixture into the cupcake cases, filling to about 2/3 full.
  16. Bake in the oven for about 30 minutes until lightly golden brown. The cakes will spring back lightly when touched, if cooked.
  17. Remove from the oven and leave to cool in tin for about 10 minutes, before carefully placing on a wire rack to finish cooling.


While the cakes are in the oven, make up the buttercream:
  1. In a large mixing bowl, beat the butter, maple syrup and half of the icing sugar until smooth.
  2. Add the rest of the icing sugar and beat until smooth and creamy.
  3. Add milk (if needed to bring the buttercream to a piping consistency) and beat again.
  4. Put buttercream into a piping bag with a large round nozzle.

Once cakes are cooked and cooled:
  1. Use a tea spoon to cut a cone out from the centre of the cakes.
  2. Cut the top disk off each cone and retain.
  3. Fill the hole in each cake with a teaspoon of pureed apple and then replace a cake disk onto each cake to seal the hole.
  4. Pipe the butter cream into a small flat swirl on each cupcake.
  5. Push the mini marshmallows into the buttercream, leaving space for the heads.
  6. Push the heads into place.  


Sunday, 16 March 2014

Rainbow cupcakes

Lemon and passion fruit cupcakes topped with a piped blue butter cream rose swirl, piped clouds and a rainbow belt sweet

Birthday time again – and my turn to make cakes for the Friday cake meeting at work. I decided to use up one of the small Christmas cakes that I had left over from Christmas (still well preserved in a mixture of sloe gin / cherry brandy / plum liqueur!) and make a couple of complementary cakes. As there is a coeliac amongst my colleagues, I made the very delicious gluten-free carrot, coconut and pistachio cake that I last made in October again.

Cupcakes are generally seen as one of my specialities and I hadn’t made any for a while, so I decided that I would make some lemon cupcakes, filled with passion fruit curd (as I had some in the fridge!) and topped with lemon buttercream.

Given the never-ending rain that we have all had recently, I was inspired by some rainbow-themed cupcakes that I had seen on Pinterest. When it came to decorating the cakes, I tried just smoothing the buttercream on with a pallet knife but my pallet knife skills are not the best and it looked a bit scruffy to me. I decided to go with my ever-reliable  Wilton 2D nozzle and pipe roses. The clouds were piped with a small round nozzle. The rainbows themselves were fizzy multi-coloured belt sweets – cut in half and then stuck down into the clouds.

Lemon and passion fruit cupcakes topped with a piped blue butter cream rose swirl, piped clouds and a rainbow belt sweet
These cupcakes always taste fantastic – I just love the tangy passion fruit curd combined with the zingy lemon cake and buttercream. When they were first complete, I wasn’t that happy with the finished look but the next morning, I did feel a bit more confident about them – and everyone at work loved them!  If I were to do them again (maybe with a bit more time), I’d love to add little pots of gold to these! 

Monday, 7 October 2013

Mini Victoria sponge cakes

Mini Victoria sponge filled with vanilla buttercream and raspberry jam, topped with a fresh raspberry
A friend recently asked me for a standard, reliable Victoria sponge recipe and, checking through the blog, I realised that I haven’t written up the recipe that I generally use. My sponge cake is a bit of an amalgam of various recipes – picking up ideas from different people and traditions! 

Rather than just writing up the recipe, I thought I had better give it a run out and this seemed like an excellent opportunity to use this year’s favourite baking tin: the Lakeland mini sandwich tin. However, I didn’t really think too much about quantities and so made the standard quantity for a two layer Victoria sponge – half of this would have been plenty for the tin! Therefore, I ended up popping the spare mixture into cupcake cases to make Victoria sponge cupcakes.

This recipe makes a beautifully light and fluffy sponge cake – it can be made as a quick all-in-one cake in the food processor but I haven’t tried this! My food processor is too small and I’m a bit of a traditionalist! A few tips to ensure that your sponge is light and fluffy:

  • Make sure that all of your ingredients are at room temperature
  • Beat the butter and sugar for at least 5 minutes (with a stand / electric mixer, longer if by hand!)
  • Beat for at least 2 minutes after adding each egg, preferably more!
  • Fold the flour in carefully – do not beat at this stage, as this activates the gluten in the flour and will make your cake tough.
  • Add enough milk to create a smooth, soft mixture that drops off a spoon in smooth lumps – not so much that it runs off.

What you choose to fill it with is completely up to you! Traditionalists will argue whether a Victoria sponge is filled with jam / jam and cream and will tell you that it should not have a topping but merely dusted with icing/castor sugar. Personally, I love raspberry jam and whipped double cream as a filling, but this does require keeping the cake in the fridge if you are not serving immediately. On this occasion, I decided to fill with jam and vanilla buttercream. If you don’t make your own jam (I don’t!), I would strongly recommend mashing up raspberries and adding these to shop-bought jam – this adds a real zing and liveliness to the filling.

The cupcakes were very different to my standard vanilla cupcakes: these were very light and fluffy – almost melting to nothing in your mouth! The ones I generally make are a little denser and richer – I guess it is very much down to personal preference! I filled these with raspberry jam and topped with vanilla buttercream.

Victoria sponge cake
Ingredients
(for two 21cm sandwich tins, halve ingredients to fill the mini sandwich tin or to make 12 cupcakes)


    Victoria sponge cupcake filled with raspberry jam and topped with a swirl of vanilla buttercream and polka dot sprinkles
  1. 4 large eggs – weighed
  2. Equal weight of butter
  3. Equal weight of golden castor sugar
  4. Equal weight minus 30g of self-raising flour
  5. 30g cornflour
  6. 1 tsp baking powder
  7. 1-2 tsp good quality vanilla extract
  8. 3-4 tblsp milk (at room temperature) 

To fill and top
Vanilla buttercream:

  1. 115g butter, at room temperature
  2. 500g icing sugar, sifted
  3. 60ml milk (at room temperature)
  4. 1 tsp vanilla extract
  1. 4 tablespoons raspberry jam
  2. 1 punnet raspberries
Method
  1. Preheat the oven to 165C.
  2. Grease your chosen baking tins. Wilton’s cake release spray is fantastic!
  3. Cream the butter and the sugar – beating for at least 5 minutes with a stand / electric mixer, until the mix is pale and fluffy.
  4. Add the vanilla extract.
  5. Add the eggs one at a time and beat for at least 2 minutes after each addition. Add a spoonful of flour with each egg to prevent curdling.
  6. Gently fold in the rest of the flour, cornflour and baking powder.
  7. Add in milk, a little at a time, until you reach a soft, dropping consistency.
  8. Spoon evenly into your chosen tin.
  9. Bake in pre-heated oven for 20-25 minutes. The cake should be lightly golden, slightly pulling away from the edge of the tin and springy when gently touched.
  10. Remove from oven and place on a wire cooling rack.
  11. Leave to cool for 15 minutes and then remove from tins.
  12. Cool on a wire rack.
To fill and top:

  1. In a large mixing bowl, beat the butter, 30ml milk, vanilla extract and half of the icing sugar until smooth.
  2. Add the rest of the icing sugar and beat.
  3. Add the remaining milk as needed to reach a smooth, creamy texture.
  4. Mash half of the raspberries with a fork and stir into the jam.
  5. Spread or pipe some of the buttercream onto one half of the sandwich cake.
  6. Spoon jam on top of the buttercream.
  7. Gently place the second cake on top of the first.
  8. Top with piped buttercream and the remaining raspberries.
11 Victoria sponge cupcakes filled with raspberry jam and topped with a swirl of vanilla buttercream and polka dot sprinkles


Sunday, 7 April 2013

Passion fruit cupcakes


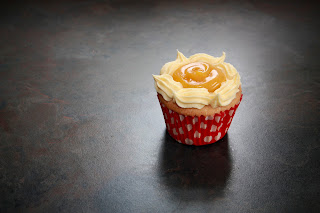
Vanilla cupcakes with passion fruit curd and passion fruit buttercream
Having made Millionaire’s Shortbread for my cousin’s visit, I was in a baking mood, so I decided to make some cupcakes too. I had half a jar of passion fruit curd left from making lemon and passion fruit cupcakes not long ago, which needed using up, so I convinced EHH to pop up to the shop to buy me some passion fruits and decided to make passion fruit cupcakes.


I started by straining the passion fruit pulp through a sieve and realised that you don’t get much from three passion fruit! Therefore, I decided to stick with a simple vanilla cupcake base, fill it with passion fruit curd and top with buttercream flavoured with the passion fruit juice.


The vanilla cupcakes worked well as a base for the passion fruit curd and buttercream. However, I think these cupcakes ended up with too much curd and not enough buttercream – the curd over-powered and made the cake slightly too tart (even for my tastes). I think the cakes would have worked better with a filling of curd and a whole swirl of buttercream. The strained passion fruit juice had a real hit of flavour and worked well in the buttercream, although I would suggest 4 passion fruits for slightly more flavour.


Vanilla cupcakes with passion fruit curd and buttercream


Ingredients

  1. 110g butter, at room temperature
  2. 225g golden castor sugar
  3. 2 large eggs
  4. 150g self-raising flour, sifted
  5. 125g plain flour, sifted
  6. 120ml semi-skimmed milk
  7. I tsp vanilla extract
  8. 4 tblsp passion fruit curd

Buttercream:


  1. 115g butter, at room temperature
  2. 500g icing sugar, sifted
  3. 4 passion fruits – juice strained through a sieve
  4. Milk (as needed)

Method

  1. Preheat oven to 160C/350F/GM4.
  2. Line a 12 hole muffin tin with cupcake cases.
  3. In a large mixing bowl, cream the butter and sugar until light and fluffy this will take at least 5 minutes with an electric hand mixer – don’t rush this stage).
  4. Add the eggs, one at a time, mixing for a few minutes after each addition. It should result in a lovely light mousse-like mixture.
  5. Combine the two flours in a separate bowl.
  6. Combine the milk and vanilla extract in a jug.
  7. Add one third of the flours to the creamed mixture and stir gently to combine.
  8. Pour in one third of the milk mixture and stir gently.
  9. Continue to add flours and then milk mixture alternately, stirring gently after each addition, until all have been added.
  10. Spoon mixture into the cupcake cases, filling to about 2/3 full.
  11. Bake in the oven for about 30 minutes until lightly golden brown. The cakes will spring back lightly when touched, if cooked.
  12. Remove from the oven and leave to cool in tin for about 10 minutes, before carefully placing on a wire rack to finish cooling.


While the cakes are in the oven, make up the buttercream:

  1. In a large mixing bowl, beat the butter, passion fruit juice and half of the icing sugar until smooth.
  2. Add the rest of the icing sugar and beat until smooth and creamy.
  3. Add milk (if needed to bring the buttercream to a piping consistency) and beat again.
  4. Put buttercream into a piping bag with a medium star nozzle.

To decorate:

  1. Use a wide skewer to make three deep holes into each cooled cupcake.
  2. Put the passion fruit curd into a piping bag and pipe into each of the holes.
  3. Pipe small swirls of buttercream around the edge of the cupcake.
  4. Fill the centre of the buttercream swirls with curd.