Showing posts with label meringue. Show all posts

Tuesday, 20 May 2014

Easy Berry Sauce

I found this quick and easy recipe for a berry sauce whilst flicking through my many and varied cookery books for dinner party dessert inspiration. The sauce was an accompaniment to a blackberry buttermilk sponge and I did consider making this for my dessert (with raspberries rather than blackberries, given the season). However, I then came across Mary Berry's lemon tart and decided to make that instead. However, I love berries with lemon tart and so decided to adapt the recipe to make this sauce to complement my tart. 

The original sauce was made with 150g each of blackberries and raspberries but I had blueberries and strawberries in the fridge and some frozen raspberries, so I decided to use these instead. 

This sauce is incredibly simple to make and tastes fantastic! It went brilliantly with the lemon tart, but would also be fantastic with ice cream, meringues, pancakes and lots of other desserts! I used the leftover sauce on my yoghurt and granola for breakfast!

Easy berry sauce
Ingredients

  1. 300g berries (I used 100g each of blueberries, raspberries and strawberries)
  2. 2 tsp cornflour
  3. 2 tblsp caster sugar

Method

  1. Put all of the ingredients in a medium-sized pan and mix gently with a wooden spoon so that all of the berries are coated with sugar and cornflour.
  2. Set the pan on a low heat and stir frequently until the juices start to run.
  3. Increase the heat slightly and simmer gently, stirring regularly, until the fruit has softened and the juices have thickened to make a sauce.
  4. Taste the sauce and add more sugar if required.
  5. Add a splash of water if the sauce is too thick. 
  6. Serve hot, warm or cold. 

Saturday, 6 April 2013

Tutti Pole Tea Shoppe – Hungerford


Today, we ventured along the M4 as far as Hungerford in search of cups and saucers! Sounds strange, but I’ve decided that I would like some vintage/antique tea cups and saucers to use when photographing my cakes. Hungerford is full of antique centres and shops so it seemed like a great place to start the search.

After a bit of a late start (didn’t wake until 12.30!), we didn’t get to Hungerford until about 15.00, so we decided to head straight to get a bite to eat. I’d spotted the Tutti Pole Tea Shoppe sign as we drove through the town and I’m a bit of a sucker for old-fashioned “tea shoppes”! Unfortunately, once inside, the décor was more shabby than chic: the first page of the menu tells that the current owners took over in 1981 – it doesn’t look like they have changed at all since then.  The walls are a rather garish pink and the tables and chairs are dated pine. The cake display on the front counter was also quite unappealing – rather than having whole/partial cakes on display, there was a small, lonely looking slice of each type of cake out as display.

However, walking to our table, I was tempted by the display of huge meringues in an old-school chilled display cabinet and I remained hopeful that the food could be good. The service was a little over-keen, I had barely taken my coat off when we were asked if we were ready to order. We asked for a couple of minutes but were then asked again when we were only half-way through the menu. We had skipped lunch and so we decided to share a sandwich and then have a cake each.  The menu itself did not particularly inspire (both the dated and rather grubby leatherette folder and inserts and the choice of food), again it very much seemed that it hadn’t been updated since the 80s. At this point, I was tempted to get up and leave, but we hadn’t seen anywhere else and it always feels a bit wrong to leave, having sat down at a table and looked at the menu. We decided to stick it out and hope that the food was good.

The sandwich choice was very traditional – cheese, ham, egg, tuna etc and not much tempted. In the end, we decided to share a tuna melt toasted sandwich, EHH went for one of his favourites – bread pudding and I chose one of the huge meringues on display, accompanied, of course, by a pot of tea for two.

EHH's bread pudding
The food and drinks arrived promptly. The pot of tea (expensive at £1.95 per person) came in a 80s style tea set. It easily provided 2 cups of tea each and the extra pot of water would have done an extra cup each, except there weren’t enough tea bags in the pot and so the remaining tea was very weak. We were amused that our toasted sandwich had clearly been done in a 90s toasty-maker, not that we have any objection to this, but it just isn’t something you see very often these days, and very much fitted with our overall impression of the place. The tuna melt toasty itself (pricey for what it was at £4.75) was fine and came accompanied with a little side salad of lettuce, tomato, cucumber and cress – we liked the fact that we had told the waiter that we were sharing and so they had given us half each on our own plate.  
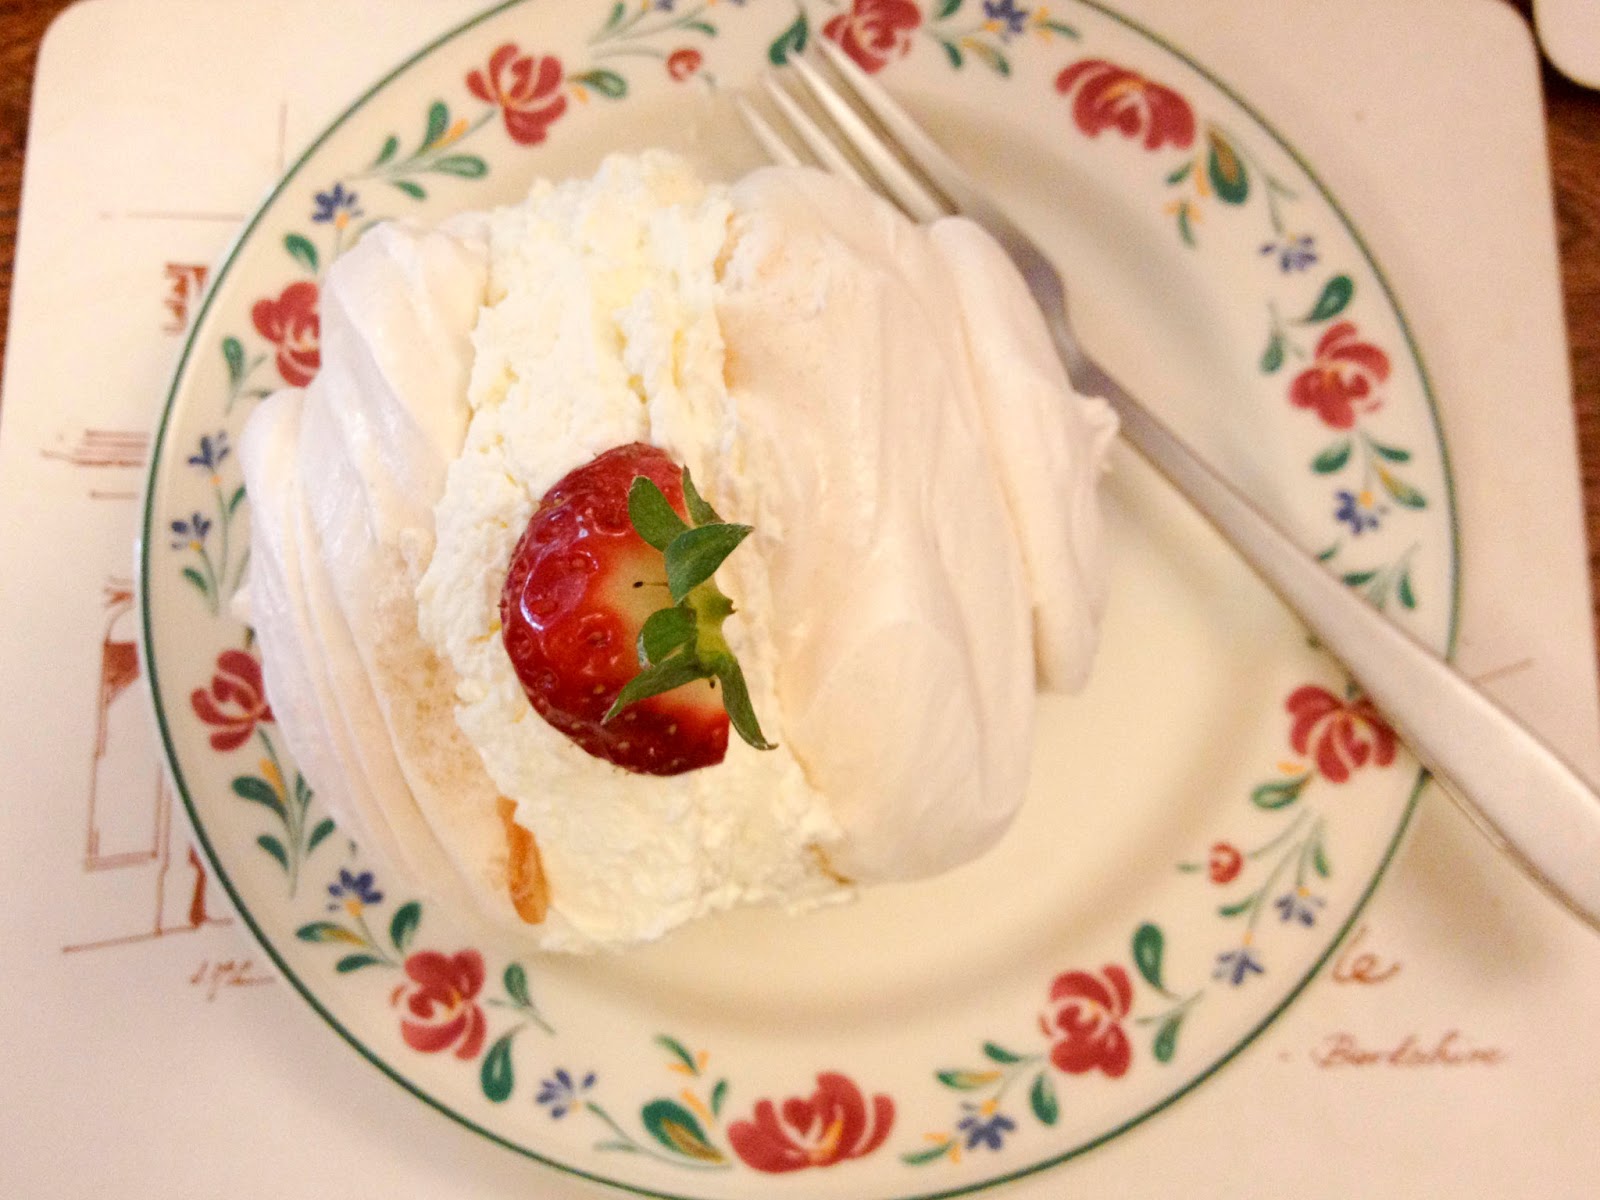
My meringue
EHH’s bread pudding (cheap at about £1.75) was ok but nothing special – it had a good stodgy texture but could have done with more fruit and a bit of spice. My meringue (cheap at £2.75) looked amazing but was really quite disappointing - it was over-sweet and very crisp all the way through, missing the lovely chewy centre that I always look for in a good home-made meringue. It came with a huge amount of cream but only half of a strawberry – would have been nice to have more fruit to balance the extreme sweetness of the meringue. There was no way I could have eaten the whole meringue and so EHH ended up eating half to help me out!

Overall, I was disappointed with Tutti Pole Tea Shoppe – it has so much potential but missed on nearly all aspects.  The pricing of the food and drinks seemed odd – some things quite cheap (particularly the cake) and some really quite expensive. It has a really interesting history, is in a great location and appears to be very much part of the local community (we were touched by a number of pictures on the wall that were given to the place in memory of others) but we spent much of our time in there discussing how it could be updated and improved. We enjoyed our next couple of hours in Hungerford, pottering around the antique centres and will definitely return to the town, but not to the Tutti Pole.


Thursday, 17 January 2013

Strawberry and white chocolate macaroons


White chocolate and strawberry macaroons

Wow – ok, first post of 2013!  Start of this year has been a bit manic and so I’m a bit behind on writing things up. Hopefully things have calmed down a bit now!


Last week was a friend’s birthday and I wanted to do a few fab things for her.  I decided that I hadn’t made macaroons in absolutely ages so fancied giving them a go again. My friend has always loved the apple cakes that I have made in the past so decided to also make a batch of apple and cinnamon cupcakes – recipe and photos to follow in next blog post.


As mentioned, I haven’t made macaroons in months and months.  I first made them just over a year ago – fancying a challenge.  They are quite fiddly and you do need to be very precise - but they are definitely worth the effort for a special occasion. I did loads of research and ended up going with Brave Tart’s recipe and suggestions – partly because she uses a KitchenAid.  She has loads of great suggestions on how to make macaroons – which tips are essential and which are purely myths.  Although I have to admit that I do stick with a few things she says aren’t essential – here's my version.


Macaroons


Ingredients

  1. 115g ground almonds
  2. 230g icing sugar*
  3. 144g egg whites (about 4 large eggs), at room temperature
  4. 72g granulated sugar
  5. 1/2 tsp salt
  6. Small amount paste food colouring


Method

  1. Trace out 3.5 guide-circles (at least 3cm apart) onto baking parchment and then flip it over, ink side down.  I use one of my large piping tips, but a small cookie cutter or large bottle lid could also work.
  2. Prepare a large piping bag, fitted with a medium round  tip.
  3. Line two  baking trays lined with the prepared baking parchment.
  4. Sieve the icing sugar into a bowl.
  5. Sieve the ground almonds into the same bowl – discard any bits that don’t go through the sieve (make sure that you have the correct weight in the bowl after sieving).
  6. Combine the egg whites, sugar and salt in the bowl of a stand mixer.
  7. Turn the mixer to medium (4 on a Kitchen Aid) and whisk for 3 minutes. The mix will not seem especially foamy at that point.
  8. Increase the speed to medium-high (7 on a Kitchen Aid) and whisk another 3 minutes, then crank the speed to 8 for go another 3 minutes. You should have a very stiff, dry meringue.  If the meringue has not become stiff enough to clump inside the whisk, continue beating for another minute, or until it does so.
  9. Add in a small amount of the food colouring and whisk for a final minute on the highest speed  Don’t worry if it deflates a little at this stage – I find adding the colour can make this happen.
  10. Remove the bowl from the mixer.
  11. Add the dry ingredients all at once and fold them in with a rubber spatula. Use both a folding motion (to incorporate the dry ingredients) and a rubbing/smearing motion, to deflate the meringue against the side of the bowl. This is called macaronage - it is about deflating the whites: you want to knock the air out of the meringue.
  12. Count each fold carefully. After about 25 folds, the mixture will still have a quite lumpy and stiff texture. You probably want to do another 15 or so folds.
  13. To test when the batter is ready, spoon some of the mix out and dollop it on top. Count to 30 – the dolloped mix should gradually incorporate back into the rest of the mixture. If it doesn’t incorporate, fold again. Keep testing to make sure that you don’t go too far. Overmixed macaroon batter has a runny, pancake batter-like texture. It will ooze continuously. I don’t know of anything to save it at this point so don’t go too far!
  14. Transfer about half the batter to a piping bag.
  15. Pipe the batter into the pre-traced circles on the baking parchment lined trays.  Stop piping just before the circle of batter reaches the borders of the drawn circle, as the batter will continue to spread just a bit.
  16. When the piping bag is nearly empty, re-fill with batter and continue to pipe. 
  17. After piping your macaroons, lift the baking tray and bang it hard on your worktop. Turn the tray ninety degrees and bang twice more. This will dislodge any large air bubbles that might cause your macaroons to crack
  18. Turn the oven on to preheat at 150C
  19. Leave your piped macaroons to rest on the worktop for at least 20 minutes while the oven heats up. 
  20. Bake for about 18 - 25 minutes. To test if they are baked, gently peel the baking parchment  away from a macaroon at the edge of the tray.  If, the top comes off, leaving the bottom on the parchment, they need to go back in the ovenThe macaroon should gently peel off, but don’t worry if it sticks a little – the macaroons will continue to bake a little and firm up on the tray whilst cooling.  
  21. When the macaroons have baked, remove from the oven and cool thoroughly on the pans, before peeling the cooled macaroons from the parchment.
  22. Once cool, fill a piping bag with buttercream of your choice and pipe into half of the shells. Add any other fillings then sandwich them with plain halves.


White chocolate and strawberry filling


White chocolate and strawberry macaroons


This is the filling I made for the pictured macaroons. It tasted great straight away as the slightly sharp strawberry puree contrasts well with the very sweet white chocolate buttercream. However, the puree was too runny and spurted out of the back of the macaroons! After a day, this problem resolved as the strawberry puree soaked into the macaroons. However, I then found them too sweet as you lost the sharpness of the fresh strawberry.  I think if I were to try them again, I would have a go at sticking a sheet of gelatine in the puree to set it a little.


White chocolate buttercream


Ingredients

  1. 60g butter, at room temperature
  2. 250g icing sugar
  3. ½ tsp vanilla extract
  4. 2 tblsp milk
  5. 3 tblsp double cream
  6. 100g good quality white chocolate


Method

  1. Place the white chocolate in a glass bowl and set the bowl over a saucepan of gently simmering water.
  2. Stir until melted.
  3. Remove the bowl from the saucepan and set aside to cool slightly.
  4. Place the butter, vanilla extract, milk and half of the icing sugar in a bowl and whisk (preferably with an electric or stand mixer, although I start with a wooden spoon so that the icing sugar doesn’t form huge clouds!) until smooth and creamy.
  5. Add the rest of the icing sugar and mix again until smooth.
  6. Add in the double cream and cooled white chocolate and mix again.


Strawberry puree

  1. Place approximately 10 strawberries in a blender and blend until smooth.


Verdict

This is a really reliable recipe for macaroons - but I'm quite tempted to give another one a go - when I have some time to experiment. Although this recipe does result in a little "foot" and domed, shiny top, they don't rise quite as much as I would like. The pictures on Brave Tart's website suggests that she doesn't get much more rise. 

The filling needs refining - I like the idea of strawberry and white chocolate but need to work out how to make it work a little better. I have also made macaroons before with a passionfruit buttercream and they were delicious! As a warning, recipes do suggest that you can flavour the actual macaroon - this has always ended up killing the meringue for me - so I don't bother - the filling provides plenty of flavour!