Showing posts with label Christmas baking. Show all posts

Monday, 25 November 2013

Orange & Cinnamon Shortbread

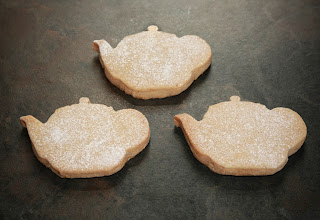
Orange and cinnamon shortbread in teapot shapes


Last week was my turn on the rota for cake at work. We have a big team briefing every Friday known affectionately as the “Friday cake meeting” – there’s a rota with each week assigned to a member of the team! It’s taken very seriously! Unfortunately, I have set a rather strong precedent and so I had people telling me all week that they were excited about what I was going to produce on Friday – talk about pressure!


The trouble with the Friday cake meeting is that it is on a Friday! This means that you have to bake on a week night after work and as it had been a long week, I wasn’t up for making anything fancy! To complicate things further, we have one person who is gluten-intolerant and one person who is allergic to nuts and eggs! They always insist that they don’t want people to go to extra effort for them but I wanted to ensure that I catered for them both.


I decided to go with the gluten-free lemon polenta cake that I made earlier in the week (which was a bit of a disaster as I miscalculated and used too few eggs – having drowned the resulting cake in lots of lemon syrup, it was edible but nowhere near perfect – fail!) and two new recipes: toffee apple crumble cake and these orange and cinnamon shortbread biscuits.


I’d seen this Cookie’s cakes and Bakes recipe on Pinterest a little while ago and had pinned it onto my Christmas Baking board. It seemed a nice simple recipe that would work well as little baked Christmas presents, or as part as a Christmas hamper. It’s also conveniently egg-free and so this seemed like a great opportunity to try it out.


It’s a great simple and speedy recipe and would be great for making with kids. I used my favourite teapot cookie cutter and simply dusted the cooked biscuits with icing sugar, but you could drizzle with chocolate, or an orange blossom flavoured water icing. You could also vary the flavouring – adding lemon zest, or vanilla essence, or other spices. Or you could add chopped chocolate, or dried fruit, or anything else you fancy!  


The resulting biscuits are short and crispy. They will lose their crisp crunch after a day but they will last fine for at least a week. I actually prefer them once they are a day old and are a bit softer, but that’s probably a matter of taste!


Orange & Cinnamon Shortbread


Ingredients

  1. 200g soft butter
  2. 100g icing sugar
  3. 100g cornflour
  4. 250g Plain flour
  5. Zest of one orange
  6. 1 tsp cinnamon


Method

  1. Pre-heat the oven to 180C.
  2. Line 2 baking trays with baking parchment.
  3. Beat the butter until very light and creamy.
  4. Add the orange zest and beat.
  5. Slowly add the icing sugar, cornflour, plain flour and cinnamon, stirring gently until combined.
  6. Use your hands to bring the mixture together to make a dough. Try not to handle the dough too much – it will affect the texture of the shortbread.
  7. Roll the dough out between two sheets of baking parchment until 10mm thick.
  8. Use cookie cutters to cut out desired shapes.
  9. Re-roll any off-cuts and cut out more shapes.
  10. Place on baking trays and bake for 12-15 minutes or until pale golden around the edges.
  11. Remove from oven and allow to cool for 5 minutes on the baking tray.
  12. Tip onto a wire rack to cool completely.

Sunday, 24 November 2013

Chocolate orange cookies


Chewy chocolate orange cookies
Having had the girls over for a girly evening (complete with chocolate and raspberry brownies, lemon polenta cake, gossip and Coyote Ugly!), they left at about 11.00 on Sunday morning and I realised that I was out for a late lunch for a friend’s birthday, so I should whip up something quick and tasty as a small gift.

I didn’t have the time or energy to make anything too extravagant, so when I found orange-flavoured dark chocolate in the cupboard, I decided that I could make some quick and delicious chocolate orange cookies. These cookies are usually made with 450g of dark chocolate, so it was easy to replace with the orange-flavoured dark chocolate. I only had 300g of this, so I added 100g milk chocolate and 50g of chopped up orange matchmakers!  You could probably also make with all orange-flavoured milk chocolate (but they may be a little too sweet), or all dark chocolate, but I think the mix worked particularly well. I also replaced the vanilla extract in the original recipe with the zest of an orange.

I’ve added a rest stage for the cookie mixture into my method below. I didn’t do this when I made these cookies and, as you can see from the picture, they spread out too much and so were a bit thin (but still delicious!). I didn’t fit all of the mixture onto my baking trays, so had to do a second batch (of 3) once the first were cooked. This batch stayed much thicker and so I have added the rest stage in!  

Overall, I’m not generally a big chocolate fan, but these are absolutely delicious! Rich, chewy, chocolatey, with a nice fresh orangey zing! They’d make fantastic Christmas presents. EHH loved these and so I’ll definitely be making these again.

Chocolate orange cookies
(makes 12-14 large cookies)

Ingredients

  1. 50g butter
  2. 350g orange flavoured dark chocolate, roughly chopped
  3. 100g milk chocolate, roughly chopped
  4. 2 eggs
  5. 170g soft light brown sugar
  6.  Zest of one orange
  7. 85g plain flour
  8. ½ tsp baking powder

Recipe

  1. Line 2 baking trays with baking parchment.
  2. Put the butter, the milk chocolate and half of the orange-flavoured dark chocolate in a heat-proof bowl.
  3. Place the bowl over a saucepan of simmering water and stir gently until the chocolate and butter are melted and combined.
  4. Beat the eggs, sugar and orange zest in a bowl until frothy.
  5. Pour in the chocolate mixture, beating on a slow speed until combined.
  6. Sift the flour and baking powder into a separate bowl.
  7. In three additions, stir the chocolate mixture into the flour.
  8. Stir in the remaining chocolate.
  9. Leave for 20-30 minutes to allow the mixture to firm up a bit.
  10. Pre-heat the oven to 170C.
  11. Dollop the cookie mixture onto the two prepared baking trays, allowing plenty of room between each, as the cookies will spread.
  12. Bake for 10 – 15 minutes, until the top of the cookies start to crack, the sides of the cookies are firm but the centre still fairly squidgy.
  13. Remove from the oven and allow to cool on the tray for 10 minutes.
  14. Turn out onto a wire rack to cool completely.
     

Monday, 31 December 2012

Christmas Spice Biscuits

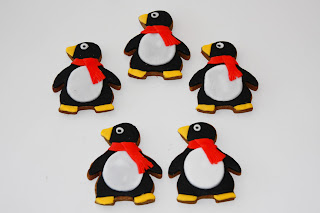
5 penguin biscuits with red scarves


Merry Christmas! Sorry it’s a little late – I’ve been having a lovely relaxing time back at home over Christmas. Time to catch up on writing up a few of the things that I made before Christmas.


At work, we have a Christmas Breakfast: everyone takes in a food contribution and we have a bit of a party, including handing out the Secret Santa gifts. I decided to buy the Really Good biscuit tin (as in my list of great gifts for bakers) as my Secret Santa gift and so felt that it really needed to be filled with biscuits! Biscuits are great as they can be prepared a few days in advance, so very useful at this time of year when evenings and weekends tend to be busy.


I wanted to make use of some of my Christmas cookie cutters, so decided on the Biscuiteers’ Treacle Spice biscuits – as the Biscuiteers’ biscuits are brilliant for using with cutters. I hadn’t baked these ones before but they sounded suitably festive! They are easy to make, although slightly hard to judge when they are cooked as they are a fairly dark colour.  They held their shape beautifully, even the delicate thin bits of the shapes. However, for me, they were a little too treacly and slightly bitter. Therefore, when I made a second batch to take home, I substituted half of the treacle for golden syrup and also added the zest of half an orange, which really improved them for me. Don’t worry if the dough seems very marbled when it comes together– this doesn’t matter and it is important not to over-work the dough as this will make the biscuits tough.


Here’s the adapted recipe (makes about 24 biscuits, I usually double the recipe):


Christmas Spice Biscuits


8 Christmas bauble cookies
Ingredients

  1. 200g plain flour
  2. ½ tsp baking powder
  3. ½ tsp ground ginger
  4. ½ tsp cinnamon
  5. ½ tsp mixed spice
  6. Zest of ½ an orange
  7. 50g dark brown sugar
  8. 100g salted butter, diced (at room temp)
  9. 25g black treacle
  10. 25g golden syrup

Method

  1. Sift the flour, baking powder and all the spices into a mixing bowl. Add the sugar and stir well.
  2. Rub in the butter, using just the tips of your fingers, until the mixture resembles fine breadcrumbs.
  3. Make a well in the centre of your mix and add the golden syrup, treacle and orange zest.
  4. Use a knife to stir the mixture until it begins to come together as a dough.
  5. Use your hands to bring the dough together.
  6. Divide the dough into two and shape into two flat disks.
  7. Place the first piece of dough between two sheets of baking parchments. (This means that you do not have to add extra flour when rolling.)
  8. Roll the dough out evenly until it is approximately 5-6mm thick all over (you can buy rolling guides, but I have this rolling pin, which is brilliant!). If the top or bottom sheets of parchment crinkle at any time, peel it off and smooth out.
  9. When rolled to the correct thickness, move the dough (still sandwiched between parchment) onto a baking tray and then into the fridge to chill for at least 20-30 minutes.
  10. After chilling, use your selected cutters to cut out the biscuits, cutting each one as close to the last as possible, in order to use the dough efficiently. Re-roll the dough as necessary, but try to work the dough as little as possible.  
  11. Place each biscuit onto a lined baking tray, allowing space between as the biscuits will spread a little.
  12. Bake the biscuits for 14 – 18 minutes. When cooked, the biscuits will be firm around the edges but still slightly soft on top.
  13. Remove the baking trays from the oven and carefully remove each biscuit from the tray, placing them gently onto a wire cooling rack. The biscuits will still be very delicate at this stage.  
  14. Allow biscuits to cool totally before storing or icing.


To decorate:

Snowflakes


I used the two smallest cutters from this set.

7 Christmas scnowflake iced biscuits

Ingredients

  1. 20ml orange juice or water
  2. 150g royal icing sugar
  3. Ice blue food colour
  4. Edible silver balls

Method

  1. Add the orange juice to the royal icing sugar.
  2. Use an electric mixer to beat the mix (starting on low and increasing to high speed) for about 5 minutes. You are looking for the mix to be a toothpaste-like consistency.
  3. Spoon the icing into a piping bag with a very small round tip.
  4. Ice the biscuits with a variety of swirling patterns, decorating with silver balls as required.

Baubles


I used the cutters from this set.


Christmas Bauble biscuits

Ingredients

  1. Ready-to-roll fondant icing
  2. Water
  3. Paste food colours
  4. Edible gold leaf
  5. Lustre dusts
  6. Clear alcohol (eg vodka/gin)

Method 

You can use either pre-coloured ready-to roll fondant or colour the fondant yourself – or I guess you could make your own fondant – but this seems like a lot of effort!

  1. Roll the coloured fondant out to approximately 2mm thick.
  2. If desired, roll the icing carefully over an embossing plate.
  3. Using the same cutters as used for the biscuits, cut out the fondant.
  4. Use a clean brush to brush each biscuit with water before carefully placing the fondant shapes onto the biscuits.
  5. Mix a sprinkling of lustre dust with a drop of the alcohol to create a paint.
  6. Use a fine paint brush to decorate the biscuits.
  7. Use another brush to gently lift fragments of the gold leaf and carefully place to form the top of the bauble.


Polar animals


I bought this set of polar animal cutters from TK Maxx just before Christmas – worth a look in there, they had lots of sets for bargain prices!

5 polar bear biscuits with blue scarves

Ingredients

  1. Ready-to-roll fondant icing
  2. Water
  3. Paste food colours

Method

You can use either pre-coloured ready-to roll fondant or colour the fondant yourself – or I guess you could make your own fondant – but this seems like a lot of effort!

  1. Roll the coloured fondant out to approximately 2mm thick.
  2. Using the same cutters as used for the biscuits, cut out the fondant.
  3. Use a clean brush to brush each biscuit with water before carefully placing the fondant shapes onto the biscuits.
  4. Use different colours of fondant to add details like the penguins’ feet and beaks, and scarves for the penguins and bears.    


 5 Blue whale biscuits


Monday, 26 November 2012

Christmas Cake

Snow scene Christmas Cake


Rather late this year, but at the weekend I finally got around to baking my Christmas Cake.  I love making Christmas Cake – mixing up the fruit and alcohol every day for a week as the fruit soaks up the liquid and becomes plump and juicy; the smell of the cake wafting through the house as it cooks; deciding how to decorate it this year …

This is a recipe adapted from one I found highly recommended on a forum – I used it last year and the cake was delicious! This is my version though – I add lots of different dried fruit rather than just the mixed fruit and add spices and zest to the fruit while soaking. I’m afraid that my measurements for soaking the fruit aren’t very precise – I tend to just chuck in a bit of whatever I find in the cupboard! This year, I mixed in sloe gin, cherry brandy, brandy and amaretto, plus a good slosh of orange juice! I soak the fruit for a week – stirring at least once in the morning and once at night – and adding more alcohol if it looks at all dry.  This year, I miscalculated and did three times the quantity of fruit in the recipe, rather than the double quantity that I need for my 9” square tin – so at the moment I have lots of leftover juicy fruit – although I have plans for it (if I can stop eating it!). 

I doubled the quantity of cake mix (and actually had to use 200g of light brown sugar rather than all dark brown sugar) and this made plenty to fill my 9” square tin and the leftover made 8 fairy cakes. When making the cake mix, make sure that you beat the butter and sugar until very light and fluffy, and again beat it lots after the addition of each egg. Don’t worry if it splits slightly after adding the eggs – it will be fine again when you have stirred in the flour. 

This year, I bought Magi Cake Strips and used them to wrap the baking tin rather than corrugated card. They worked brilliantly – the edges of the cake were not over-cooked at all (even after 6 hours of cooking!) and the cake was perfectly level – can’t wait to try them on a normal sponge cake.

So the cake is now cooked and wrapped – I’ll be unwrapping it and feeding it once or twice a week until the week before Christmas. I'm then planning to cut this large cake into 4 small square cakes before marzipanning and icing them. I'll do another post at that point! 

Christmas Cake

Ingredients
To soak the fruit:

Christmas cake before marzipan and icing
  1. 650g mixed dried fruit
  2. 50g dried cranberries
  3. 50g dried sour cherries
  4. 50g dried blueberries
  5. 100g chopped mixed peel
  6. 150 g glace cherries halved
  7. (100 g blanched almonds – chopped – optional)
  8. 1 tsp ground mixed spice
  9. ½ tsp cinnamon
  10. ½ tsp ginger
  11. ½ tsp nutmeg
  12. Grated zest of an orange
  13. Significant quantities of alcohol – eg sloe gin, cherry brandy, brandy, amaretto
  14. Orange juice


For the cake mixture:

  1. 225g plain flour
  2. 2 tsp ground mixed spice
  3. ½ tsp salt
  4. 200g butter
  5. 200g dark brown sugar
  6. 2 tblsp spoons black treacle
  7. ½ tsp vanilla essence
  8. 4 standard eggs lightly beaten

(2 x ingredients will make a 9” square cake; 3 x these ingredients will make one 12” square cake)

Method
In advance of making the cake (I do this a week in advance but a couple of days would be fine):

  1. Place all dried fruit in a large bowl and scatter over the spices and the orange zest.
  2. Pour over alcohol and orange juice so that it covers about a quarter of the fruit.
  3. Stir to ensure that all the fruit is covered.
  4. Stir a couple of times a day and add extra alcohol/orange juice to ensure that fruit plumps up.

  1. Grease 20cm 8” round or an 18cm 7” square cake tine and line the base and sides with double layer of greaseproof paper.
  2. Wrap a band of corrugated card around the outside of the tin.
    Pre-heat oven to 150C, 300F, Gas Mark 2
    Sieve together the flour, salt and mixed spice.
  3. Cream the butter, sugar, treacle and vanilla essence together until light and fluffy.
  4. Beat in the eggs, a little at a time, adding a tablespoon of the flour with the last amount.
  5. Fold in the remaining flour, then all the fruit and almonds.
  6. Turn into the prepared cake tin and make a slight hollow in the centre.
  7. Bake in a cool oven for 3-4 hours (6 hours for a 9” square cake), testing after 3 hours by inserting a skewer into the centre; when it comes out clean the cake is cooked. You may need to put foil across the top of the cake after a few hours of baking – to stop it singeing on top before the centre cooks.
  8. Remove from oven and leave in tin until cold.
  9. Use a skewer to make a few holes in the top of the cake and pour alcohol of choice over the cake while it is still warm.
  10. Wrap cake in baking parchment and then foil and store.


Once a week, take cake out of wrappings, and “feed” the cake with more alcohol, before wrapping and storing again. 


Here's two that I decorated last year: