Showing posts with label cinnamon. Show all posts

Tuesday, 8 July 2014

Carrot cupcakes with orange buttercream

11 carrot cupcakes topped with a swirl of orange buttercream

It’s been a busy couple of months with lots of friends and family visiting! I made these carrot cupcakes about a month ago, when some friends were visiting on their way down from Leeds to Cornwall. I fancied making these as I haven’t made them for ages – they are a fairly quick and easy cake to make but they taste delicious.

The recipe comes from my “go to” Cupcakes from the Primrose Bakery book. I’ve made them before and they work brilliantly well with the orange cream cheese icing in the book, however, they then need to be kept in the fridge. As my friends were travelling onwards, I wanted to give them some for their holiday and so I stuck with a simple orange buttercream and a sprinkle of cinnamon.

The recipe is simple and these are a very reliable bake. The mixture is a lot runnier than most cake mixtures, but don’t be alarmed by this. If you have time before you start baking, soak the raisins in a mixture of boiling water, orange juice and a bit of cinnamon and they will plump up beautifully.  The recipe calls for 130g raisins, but I usually chuck a few more in.

Carrot cupcakes with orange buttercream

Ingredients
    Carrot cupcake with a swirl of orange buttercream
  1. 225g carrots, peeled and trimmed
  2. 130g raisins
  3. 2 large eggs
  4. 130g caster sugar
  5. 120ml corn oil
  6. ½ tsp vanilla extract
  7. Grated zest of 1 orange
  8. 120g plain flour
  9. 1 tsp bicarbonate of soda
  10. Pinch of salt
  11. 1 tsp ground cinnamon

Orange buttercream
  1. 115g butter, at room temperature
  2. 500g icing sugar, sifted
  3. 4 tblsp freshly squeezed orange juice

Method
  1. Pre-heat the oven to 160C.
  2. Line a 12 hole muffin tin with cupcake cases.
  3. Finely grate the carrots and drain off any liquid.
  4. Combine the grated carrot with the raisins in a large bowl and set to one side.
  5. Using a stand mixer, beat the eggs and sugar together for several minutes.
  6. Add the oil, vanilla and orange zest and beat well.
  7. Sift the flour, bicarbonate of soda, salt and cinnamon together in another bowl.
  8. Gradually add these ingredients to the egg and sugar mixture, folding carefully after each addition.
  9. Pour this mixture into the bowl containing the carrots and raisins and mix with a wooden spoon until evenly distributed.
  10. Carefully spoon the mixture into the cupcake cases, filling them to about two-thirds full.
  11. Bake in the oven for about 25 minutes, until the cakes bounce back when touched.
  12. Remove from the oven and leave the cakes in the tin for about ten minutes before placing on a wire rack to cool.
  13. To make the buttercream, beat the butter, juice and half of the icing sugar until smooth.
  14. Add the rest of the icing sugar and beat until smooth and creamy.
  15. Spoon the buttercream into a piping bag topped with a Wilton 1M piping nozzle.
  16. Once the cakes have cooled, pipe a swirl of buttercream onto the cakes and top with a sprinkle of cinnamon. 


Tuesday, 29 April 2014

Sheep cupcakes (apple and cinnamon)


12 Sheep cupcakes - cinnamon cupcakes filled with apple puree and topped with maple syrup buttercream and mini marshmallows

Bake number two for the Welsh hen do! Having done a quick skim through Pinterest for Welsh-themed cupcakes, I decided that marshmallow-topped sheep cupcakes were definitely the way forward!

Having chosen lemon and blueberry mini loaf cakes as my other bake, I decided to make apple and cinnamon  flavoured cupcakes, using some apple puree left in the freezer from last Autumn’s glut of Bramley apples. I made apple and cinnamon cupcakes about a year ago, but the texture of the cakes didn’t turn out quite right (although they tasted fab!). This time, I decided to make cinnamon cupcakes and fill them with apple purée. The cinnamon cupcakes were an adaptation of the Primrose Bakery vanilla cupcakes –simply with the addition of two teaspoons of cinnamon. I added a teaspoon of vanilla extract as this helps to soften the cinnamon and give a more rounded flavour. The apple puree was added to the cooked cupcakes as a filling. I’ve recently discovered the joy of American pancakes with maple syrup and, inspired by these, decided to make a maple syrup buttercream to top these cupcakes.

To create the sheep, I made the black sheep heads out of fondant icing the night before making the cakes. This takes quite a while so it is better done in advance. However, having made them all in advance – I managed to lose one! I didn’t have the time or inclination to make another, but fortunately, EHH came to the rescue with a fab suggestion – I rolled four small thin sausages of black fondant and turned them into feet – creating an upside-down sheep!  Pushing the marshmallows into the buttercream was easy but took longer than expected – so allow plenty of time!

Once complete, I was fairly happy with these cupcakes – they tasted great and looked pretty good! The bride-to-be loved them too! The maple buttercream worked really well with the apple and cinnamon – definitely a good combination!

Cinnamon cupcakes with apple purée and maple syrup buttercream
12 Sheep cupcakes - cinnamon cupcakes filled with apple puree and topped with maple syrup buttercream and mini marshmallows

Ingredients
  1. 110g butter, at room temperature
  2. 225g golden castor sugar
  3. 2 large eggs
  4. 150g self-raising flour, sifted
  5. 125g plain flour, sifted
  6. 120ml semi-skimmed milk
  7. 2 tsp cinnamon
  8. 1 tsp vanilla extract
  9. 2 large / 3 small Bramley apples
  10. ½ - 1 tblsp soft brown sugar
Buttercream:
  1. 115g butter, at room temperature
  2. 500g icing sugar, sifted
  3. 2 tblsp maple syrup
  4. 2 tblsp milk 

To decorate
  1. Mini marshmallows
  2. Black fondant icing
  3. White fondant icing
  4. Black writing icing (optional)

To make the sheep heads:
(These can be made ahead of time and stored in a cool dry place until they are needed).
  1. Knead the black fondant until pliable.
  2. Make 12 teardrop shaped lumps of icing (approximately the size of the top segment of your index finger)
  3. Use a small ball tool to make indents on either side of the rounded end of each teardrop.
  4. Use the same tool to make indents for the eyes.
  5. Roll 24 small lumps of black fondant for the ears.
  6. Roll 24 small balls of white fondant for the eyes.
  7. Use a paintbrush to dampen the indents with water.
  8. Push the eyes and ears into place.
  9. Use the writing icing (or tiny balls of black fondant – but this will be very fiddly!) to add pupils to each eye. 
  10. Use a skewer to add two nostrils to each head.
  11. Set aside to dry.

For the cakes:
  1. Peel and chop the Bramley apples.
  2. Place the chopped apples in a saucepan with two tablespoons of water and half a tablespoon of soft brown sugar.
  3. Cook over a low heat until softened and mostly pureed ( a few small lumps is fine).
  4. Taste and add extra brown sugar as required.
  5. Place to one side to cool.
  6. Preheat oven to 160C.
  7. Line a 12 hole muffin tin with cupcake cases.
  8. In a large mixing bowl, cream the butter and sugar until light and fluffy (this will take at least 5 minutes with an electric hand /stand mixer – don’t rush this stage).
  9. Add the eggs, one at a time, mixing for a few minutes after each addition. It should result in a lovely light mousse-like mixture.
  10. Combine the two flours and the cinnamon in a separate bowl.
  11. Combine the milk and vanilla extract in a jug.
  12. Add one third of the flour mixture to the creamed mixture and stir gently to combine.
  13. Pour in one third of the milk mixture and stir gently.
  14. Continue to add flours and then milk mixture alternately, stirring gently after each addition, until all have been added.
  15. Spoon mixture into the cupcake cases, filling to about 2/3 full.
  16. Bake in the oven for about 30 minutes until lightly golden brown. The cakes will spring back lightly when touched, if cooked.
  17. Remove from the oven and leave to cool in tin for about 10 minutes, before carefully placing on a wire rack to finish cooling.


While the cakes are in the oven, make up the buttercream:
  1. In a large mixing bowl, beat the butter, maple syrup and half of the icing sugar until smooth.
  2. Add the rest of the icing sugar and beat until smooth and creamy.
  3. Add milk (if needed to bring the buttercream to a piping consistency) and beat again.
  4. Put buttercream into a piping bag with a large round nozzle.

Once cakes are cooked and cooled:
  1. Use a tea spoon to cut a cone out from the centre of the cakes.
  2. Cut the top disk off each cone and retain.
  3. Fill the hole in each cake with a teaspoon of pureed apple and then replace a cake disk onto each cake to seal the hole.
  4. Pipe the butter cream into a small flat swirl on each cupcake.
  5. Push the mini marshmallows into the buttercream, leaving space for the heads.
  6. Push the heads into place.  


Thursday, 27 February 2014

Mini orange, cinnamon and sultana loaf cakes

Cup of tea and a mini orange, cinnamon and sultana loaf cake

After a successful batch of mini lemon loaf cakes, I decided to try out a more adventurous recipe with my Lakeland mini loaf tin. After a search on Pinterest, I found this recipe by Laythetable – this recipe was for 6 mini loaves, using mini loaf paper cases. To use the 12 hole mini loaf tin, I doubled the ingredient quantities.

The original recipe suggested soaking the sultanas in Amaretto, which would be delicious! However, I didn’t have any Amaretto – after a rummage in our alcohol cupboard (which mostly contains gin!), the best  thing I could find to use as an alternative was Pimms! I also think Cointreau would be a great substitute if you have some! If you want to avoid alcohol entirely, you could simply use orange juice. As I did not plan my bake in advance, I only managed to soak my sultanas for about 45 minutes – this was ok and they did plump up a little, but the longer that you can soak them, the better!

The method for making the cake is fairly standard – it’s really important to beat the butter and the sugar thoroughly – at least 5 minutes in a stand mixer. When adding the beaten eggs, it should be done little by little to avoid the mixture splitting, however, if it does split, just add a little of the flour – this should bind the mixture back together.

Greasing the mini loaf tin well is really important. I really recommend a decent spray with Dr Oetker cake release spray and then rub the grease around with your fingers to ensure that every spot is covered.

The original recipe suggested finishing the cakes with a glaze followed by a drizzle, but I decided to go for a piped drizzle topped with a  sprinkling of orange zest. I have provided the methods for both so that you can choose!  

These cakes were really good – very moist and full of flavour! EHH took them into work and they were very well received – even by one colleague who claimed not to like orange cake!

Mini orange, cinnamon and sultana loaf cakes

Ingredients
Mini orange cinnamon and sultana loaf cake
  1. 75g sultanas
  2. Amaretto / Cointreau / Pimms / orange juice
  3. 2 oranges
  4. 1 tsp cinnamon
  5. 1 tsp baking powder
  6. 4 large eggs
  7. 170g self raising flour
  8. 60g ground almonds
  9. 230g unsalted butter
  10. 230g granulated sugar
  11. 100g icing sugar

Method
  1. Place the sultanas in a small bowl or cup and cover with the alcohol / orange juice. Leave to soak for as long as possible – ideally overnight or longer.
  2. Strain sultanas through a sieve and reserve the liquid.
  3. Preheat the oven to 180C.
  4. Lightly grease the mini loaf tin (ideally spray liberally with cake release spray) or place 12 mini loaf cases on a baking tray
  5. Zest one and a half of the oranges (save the remaining zest and the juice of the oranges for use in the icing).
  6. Sift the flour, ground almonds, cinnamon and baking powder together.
  7. Using a hand/stand mixer, cream the butter and sugar until pale, smooth and creamy.
  8. Break the eggs into a bowl and whisk with a fork to combine yolks and whites. 
  9. Bit by bit, add the eggs into the creamed butter and sugar, beating thoroughly between each addition.
  10. Add in the sultanas and orange peel.
  11. Add half of the flour mix and mix gently, then repeat with the remaining flour mix.
  12. Spoon the mixture into the tin / cases evenly.
  13. Use a teaspoon to smooth the tops.
  14. Place in the oven for around 18 - 25 minutes. Turn the tray after about 14 minutes if your oven bakes unevenly. Towards the end of the bake, you may wish to cover with brown paper to present the tops browning before the middle is cooked.
  15. Remove from the oven and allow to cool for 10 minutes before removing the cakes from the tin.
  16. Place the cakes on a wire rack to finish cooling.

To glaze (while the cakes are still warm):
  1. Juice one orange and mix this with a tablespoon of the soaking liqueur.
  2. Place the icing sugar in a bowl and add the liquid a bit at a time until it resembles runny honey.
  3. Use a skewer to make a few piercings in each cake, then spoon the glaze over each (around 2 tablespoons per cake).
  4. Top each glazed cake with a sprinkle of orange zest.

To ice with a drizzle (once the cakes are cool):
  1. Place the icing sugar in a bowl and add a spoonful of the soaking liqueur, followed by enough orange juice to create a smooth piping icing – it should be just a little runnier than toothpaste.
  2. Spoon the icing into a piping bag with a small round nozzle and drizzle across the cakes.
  3. Top each iced cake with a sprinkle of orange zest.


Monday, 25 November 2013

Orange & Cinnamon Shortbread

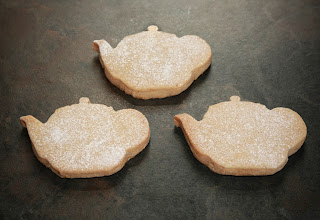
Orange and cinnamon shortbread in teapot shapes


Last week was my turn on the rota for cake at work. We have a big team briefing every Friday known affectionately as the “Friday cake meeting” – there’s a rota with each week assigned to a member of the team! It’s taken very seriously! Unfortunately, I have set a rather strong precedent and so I had people telling me all week that they were excited about what I was going to produce on Friday – talk about pressure!


The trouble with the Friday cake meeting is that it is on a Friday! This means that you have to bake on a week night after work and as it had been a long week, I wasn’t up for making anything fancy! To complicate things further, we have one person who is gluten-intolerant and one person who is allergic to nuts and eggs! They always insist that they don’t want people to go to extra effort for them but I wanted to ensure that I catered for them both.


I decided to go with the gluten-free lemon polenta cake that I made earlier in the week (which was a bit of a disaster as I miscalculated and used too few eggs – having drowned the resulting cake in lots of lemon syrup, it was edible but nowhere near perfect – fail!) and two new recipes: toffee apple crumble cake and these orange and cinnamon shortbread biscuits.


I’d seen this Cookie’s cakes and Bakes recipe on Pinterest a little while ago and had pinned it onto my Christmas Baking board. It seemed a nice simple recipe that would work well as little baked Christmas presents, or as part as a Christmas hamper. It’s also conveniently egg-free and so this seemed like a great opportunity to try it out.


It’s a great simple and speedy recipe and would be great for making with kids. I used my favourite teapot cookie cutter and simply dusted the cooked biscuits with icing sugar, but you could drizzle with chocolate, or an orange blossom flavoured water icing. You could also vary the flavouring – adding lemon zest, or vanilla essence, or other spices. Or you could add chopped chocolate, or dried fruit, or anything else you fancy!  


The resulting biscuits are short and crispy. They will lose their crisp crunch after a day but they will last fine for at least a week. I actually prefer them once they are a day old and are a bit softer, but that’s probably a matter of taste!


Orange & Cinnamon Shortbread


Ingredients

  1. 200g soft butter
  2. 100g icing sugar
  3. 100g cornflour
  4. 250g Plain flour
  5. Zest of one orange
  6. 1 tsp cinnamon


Method

  1. Pre-heat the oven to 180C.
  2. Line 2 baking trays with baking parchment.
  3. Beat the butter until very light and creamy.
  4. Add the orange zest and beat.
  5. Slowly add the icing sugar, cornflour, plain flour and cinnamon, stirring gently until combined.
  6. Use your hands to bring the mixture together to make a dough. Try not to handle the dough too much – it will affect the texture of the shortbread.
  7. Roll the dough out between two sheets of baking parchment until 10mm thick.
  8. Use cookie cutters to cut out desired shapes.
  9. Re-roll any off-cuts and cut out more shapes.
  10. Place on baking trays and bake for 12-15 minutes or until pale golden around the edges.
  11. Remove from oven and allow to cool for 5 minutes on the baking tray.
  12. Tip onto a wire rack to cool completely.


Saturday, 19 October 2013

Chai latte cupcakes


Chai latte cupcakes piped with violet, pink and cream vanilla buttercream flowers


I’ve recently found Pinterest and have been enjoying flicking through lots of cupcake pictures in search of inspiration. I’d been asked to make cakes for a colleague’s birthday - I’m known for my cupcakes but I wanted to have a go at something a bit more unusual than the standard lemon / orange / red velvet. The idea of chai latte cupcakes caught my interest and so I flicked through a few webpages in search of recipes. There weren’t many UK recipes around and so I decided to make it up, basing it on a Earl Grey recipe in my ever-reliable Cupcakes from the Primrose Bakery book.


I followed the recipe, substituting Earl Grey teabags for chai teabags but also adding in a teaspoon of cinnamon, two-thirds of a teaspoon of cardamom, quarter of a teaspoon of cloves and half a teaspoon of nutmeg. I think this was too much spice! The cakes were very strongly scented and spiced! I was planning to top the cupcakes with a cinnamon buttercream, but as they were rather highly spiced anyway, I decided to balance the flavour a little by topping with a simple vanilla buttercream.


These cupcakes really split opinion – some people loved them (the birthday girl’s husband thought they were the best cakes ever!), while others really weren’t sure. This could be purely down to the chai tea flavour, which is fairly controversial anyway! I love spice but even for me, I found the spicing a bit much. In the recipe below, I have suggested less spice than I used, as this is what I will try next time – the choice is up to you!


I was planning to decorate with something a bit more intricate but I ran out of time (having also made the amazing carrot, pistachio and coconut cake, and mini lemon layer cakes on this day!), so I went for simple piped flowers. To keep it simple, I piped the cream roses first. Then, I added pink food colour to the remaining buttercream and piped the pink flowers. Finally, I added violet food colour to the remaining buttercream and piped the violet flowers. I left the cupcakes for about an hour to allow the buttercream to set and then gave them a quick spray with pearl lustre spray, which gives a fab shiny finish.


People are always amazed by rose swirls on cakes and cupcakes but they are really not that difficult to do. This is a good photo tutorial and there are lots of film clips on YouTube. To be honest, the main things are getting the consistency of the buttercream right, a Wilton 2D piping nozzle, steady pressure on the icing bag and lots of practice! The other flowers were piped very simply with a Wilton 1M piping nozzle – just lots of little stars piped one by one around and on top of each other.


Chai latte cupcakes (single batch of 12 cupcakes)


Ingredients


  1. 175ml semi-skimmed milk, at room temperature
  2. 4 Chai tea bags
  3. 110g butter, at room temperature
  4. 225g golden castor sugar
  5. 2 large eggs
  6. 125g self-raising flour, sifted
  7. 120g plain flour, sifted
  8. ½ tsp cinnamon
  9. ½ tsp mixed spice
  10. ¼ tsp cardamon


Buttercream:


  1. 110g butter, at room temperature
  2. 60ml semi-skimmed milk, at room temperature
  3. 1 tsp vanilla extract
  4. 500g icing sugar, sifted
  5. Food colouring (preferably a paste rather than a liquid)

Method
  1. Heat 125ml milk in a saucepan over a medium heat until it just begins to boil.
  2. Remove from the heat and add the tea bags.
  3. Cover with clingfilm and leave to infuse for about 30 minutes.
  4. Discard the tea bags and add the extra 50ml of milk.   
  5. Preheat oven to 160C/350F/GM4.
  6. Line a 12 hole muffin tin with cupcake cases.
  7. In a large mixing bowl, cream the butter and sugar until light and fluffy (this will take at least 5 minutes with an electric hand mixer – don’t rush this stage).
  8. Add the eggs, one at a time, mixing for a few minutes after each addition. Add a level tablespoon of the plain flour with each egg. It should result in a lovely light mousse-like mixture.
  9. Combine the rest of the plain flour with the self-raising flour and all of the spices in a separate bowl.
  10. Add one third of the flours to the creamed mixture and stir gently to combine.
  11. Pour in one third of the infused milk and stir gently.
  12. Continue to add flours and then milk mixture alternately, stirring gently after each addition, until all have been added.
  13. Spoon mixture into the cupcake cases, filling to about 2/3 full.
  14. Bake in the oven for about 30 minutes until lightly golden brown. The cakes will spring back lightly when touched, if cooked.
  15. Remove from the oven and leave to cool in tin for about 10 minutes, before carefully placing on a wire rack to finish cooling.


While the cakes are in the oven, make up the buttercream:

  1. In a large mixing bowl, beat the butter, milk, vanilla extract and half of the icing sugar until smooth.
  2. Add the rest of the icing sugar and beat until smooth and creamy.

Sunday, 16 June 2013

Egg-free banana, oat and raisin muffins


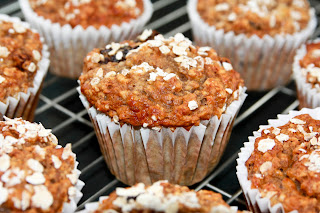
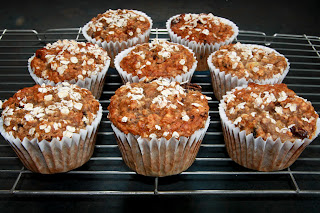
Banana, oat and raisin muffins


Sunday afternoon and I’m waiting to watch the Queen’s Club tennis final but, unsurprisingly, the tennis is suspended due to rain.  Finding a hand of overripe bananas in the fruit bowl, I decided to make use of the time and whip up some banana muffins. I found this recipe on the web and decided to give it a go as it looked fairly simple and we had all of the ingredients in the cupboard.  I added a handful of raisins to the recipe for extra flavour and texture (would probably have used sultanas but we didn’t have any!).

This is a very easy and quick recipe. They are very banana-y and feel very healthy! I put in three bananas and I think that this was slightly too much as the balance of banana to cake wasn’t quite right and this meant that they were slightly sticky in the cases. The texture was generally good though – crisped on top but moist inside.
 
Egg-free banana, oat and raisin muffins

Ingredients

  1. Banana, oat and raisin muffins cooling on rack25g/1oz unsalted butter
  2. 3 tsp runny honey
  3. 2-3 large, ripe bananas
  4. 100g/3.5oz plain flour
  5. 55g/2oz porridge oats
  6. 1 heaped tsp baking powder
  7. 1/2 tsp bicarbonate of soda
  8. 1/2 tsp cinnamon
  9. Handful raisins or sultanas
  10. 75ml/2.5fl oz milk            


Method

  1. Preheat the oven to 190C/375F/Gas mark 5.
  2. Line a muffin tin with paper cases.
  3. Melt the butter and honey in a saucepan.
  4. Mix together all the dry ingredients in a bowl.
  5. Mash the banana and mix with the honey and butter.
  6. Add this mixture and the milk to the dry ingredients, stirring until mixed lightly.
  7. Spoon into the muffin cases, sprinkling a few extra oats on top.
  8. Bake for 25mins until golden brown and firm to touch.