Showing posts with label cake. Show all posts

Monday, 4 August 2014

Rhubarb and custard cupcakes

3 Rhubarb and custard flavoured cupcakes iced to look like tennis balls


Having recently moved my rhubarb into a new position, it has gone crazy! So, as the Wimbledon Ladies’ Final finished disappointing quickly, I had lots of time to try out lots of new recipes to use up my rhubarb!

Having decided to try out a rhubarb and lemon cake, I fancied making something with a Wimbledon theme and so decided on some tennis ball cupcakes. If I were making these for something special, I’d probably have made some more appropriate strawberry and cream flavoured cakes, or maybe even some Pimms flavoured cakes, but as they were just for fun, and I needed to make use of my rhubarb glut, I decided on rhubarb and custard flavoured cupcakes. These also gave me the opportunity to try out my new flavourings from Lakeland.

I followed my standard vanilla cupcake recipe, replacing the vanilla extract with 18 drops of the rhubarb flavouring and filling the cupcakes with rhubarb compote. I replaced the vanilla extract in the buttercream with 15 drops of custard flavouring. The rhubarb flavour did come through gently in the cakes but I think that it could have done with a bit more – I have suggested 20 drops in the recipe below. I’m not completely convinced by the custard flavour – I’m not sure that the custard taste really came through the buttercream – it didn’t taste particularly different to standard vanilla buttercream. I’ll have to try out the flavouring in something else to test this out.

Overall though, I did enjoy these cakes. I wasn’t sure that the grass nozzle (mine came in a set from Lakeland that is incredibly useful!) would give the right effect for the tennis balls, but it worked out pretty well. The cakes tasted good and the slightly sour rhubarb compote was balanced well by the sweet custard buttercream. Will definitely make these again.


Rhubarb and custard cupcakes

Ingredients
  1. 110g butter, at room temperature
  2. 225g golden castor sugar
  3. 2 large eggs
  4. 150g self-raising flour, sifted
  5. 125g plain flour, sifted
  6. 120ml semi-skimmed milk, at room temperature
  7. 20 drops rhubarb flavouring
  8. 300g rhubarb
  9. 1-2 tblsp soft brown sugar

Buttercream:
  1. 110g butter, at room temperature and very soft
  2. 500g icing sugar, sifted
  3. 15 drops custard flavouring
  4. 60ml milk
  5. Green and yellow paste food colouring
  6. 100g icing sugar

Method
  1. Preheat oven to 160C.
  2. Line a 12 hole muffin tin with cupcake cases.
  3. In a large mixing bowl, cream the butter and sugar until light and fluffy this will take at least 5 minutes with an electric hand mixer – don’t rush this stage).
  4. Whisk the eggs together in a small bowl.
  5. Add the eggs to the butter and sugar mixture, a bit at a time, mixing for a few minutes after each addition. It should result in a lovely light mousse-like mixture.
  6. Combine the two flours in a separate bowl.
  7. Combine the milk and rhubarb flavouring in a jug.
  8. Add one third of the flours to the creamed mixture and stir gently to combine.
  9. Pour in one third of the milk mixture and stir gently.
  10. Continue to add flours and then milk mixture alternately, stirring gently after each addition, until all have been added.
  11. Spoon mixture into the cupcake cases, filling to about 2/3 full (or about 65g each).
  12. Bake in the oven for about 30 minutes until lightly golden brown. The cakes will spring back lightly when touched, if cooked.
  13. Remove from the oven and leave to cool in tin for about 10 minutes, before carefully placing on a wire rack to finish cooling.

While the cakes are in the oven:
  1. In a large mixing bowl, beat the butter, milk, vanilla extract and half of the icing sugar until smooth.
  2. Add the rest of the icing sugar and beat until smooth and creamy.
  3. Add the green and yellow food colouring until you reach the desired colour.
  4. Put buttercream into a piping bag with a large grass nozzle.
  5. Chop the rhubarb into approx. 2cm slices.
  6. Place in a small saucepan with a splash of water and 1 tblsp soft brown sugar.
  7. Heat gently until the rhubarb is soft.
  8. Strain off any juices through a sieve
  9. Mash the rhubarb gently and add extra soft brown sugar if needed. 

Once cakes are cooked and cooled:
  1. Use a tea spoon to cut a cone out from the centre of the cakes.
  2. Cut the top disk off each cone and retain.
  3. Fill the hole in each cake with a teaspoon of the prepared rhubarb and then replace a cake disk onto each cake to seal the hole.
  4. Pipe short grass-like spikes onto each cupcake until covered.
  5. Leave to firm.
  6. Mix the icing sugar with a small amount of water until it reaches a toothpaste-like consistency.
  7. Place this icing into a piping bag with a small round nozzle.
  8. Use a rounded knife to gently draw on the curves of the tennis ball onto each cupcake.
  9. Pipe over these curves with the white icing.


Tuesday, 29 April 2014

Sheep cupcakes (apple and cinnamon)


12 Sheep cupcakes - cinnamon cupcakes filled with apple puree and topped with maple syrup buttercream and mini marshmallows

Bake number two for the Welsh hen do! Having done a quick skim through Pinterest for Welsh-themed cupcakes, I decided that marshmallow-topped sheep cupcakes were definitely the way forward!

Having chosen lemon and blueberry mini loaf cakes as my other bake, I decided to make apple and cinnamon  flavoured cupcakes, using some apple puree left in the freezer from last Autumn’s glut of Bramley apples. I made apple and cinnamon cupcakes about a year ago, but the texture of the cakes didn’t turn out quite right (although they tasted fab!). This time, I decided to make cinnamon cupcakes and fill them with apple purée. The cinnamon cupcakes were an adaptation of the Primrose Bakery vanilla cupcakes –simply with the addition of two teaspoons of cinnamon. I added a teaspoon of vanilla extract as this helps to soften the cinnamon and give a more rounded flavour. The apple puree was added to the cooked cupcakes as a filling. I’ve recently discovered the joy of American pancakes with maple syrup and, inspired by these, decided to make a maple syrup buttercream to top these cupcakes.

To create the sheep, I made the black sheep heads out of fondant icing the night before making the cakes. This takes quite a while so it is better done in advance. However, having made them all in advance – I managed to lose one! I didn’t have the time or inclination to make another, but fortunately, EHH came to the rescue with a fab suggestion – I rolled four small thin sausages of black fondant and turned them into feet – creating an upside-down sheep!  Pushing the marshmallows into the buttercream was easy but took longer than expected – so allow plenty of time!

Once complete, I was fairly happy with these cupcakes – they tasted great and looked pretty good! The bride-to-be loved them too! The maple buttercream worked really well with the apple and cinnamon – definitely a good combination!

Cinnamon cupcakes with apple purée and maple syrup buttercream
12 Sheep cupcakes - cinnamon cupcakes filled with apple puree and topped with maple syrup buttercream and mini marshmallows

Ingredients
  1. 110g butter, at room temperature
  2. 225g golden castor sugar
  3. 2 large eggs
  4. 150g self-raising flour, sifted
  5. 125g plain flour, sifted
  6. 120ml semi-skimmed milk
  7. 2 tsp cinnamon
  8. 1 tsp vanilla extract
  9. 2 large / 3 small Bramley apples
  10. ½ - 1 tblsp soft brown sugar
Buttercream:
  1. 115g butter, at room temperature
  2. 500g icing sugar, sifted
  3. 2 tblsp maple syrup
  4. 2 tblsp milk 

To decorate
  1. Mini marshmallows
  2. Black fondant icing
  3. White fondant icing
  4. Black writing icing (optional)

To make the sheep heads:
(These can be made ahead of time and stored in a cool dry place until they are needed).
  1. Knead the black fondant until pliable.
  2. Make 12 teardrop shaped lumps of icing (approximately the size of the top segment of your index finger)
  3. Use a small ball tool to make indents on either side of the rounded end of each teardrop.
  4. Use the same tool to make indents for the eyes.
  5. Roll 24 small lumps of black fondant for the ears.
  6. Roll 24 small balls of white fondant for the eyes.
  7. Use a paintbrush to dampen the indents with water.
  8. Push the eyes and ears into place.
  9. Use the writing icing (or tiny balls of black fondant – but this will be very fiddly!) to add pupils to each eye. 
  10. Use a skewer to add two nostrils to each head.
  11. Set aside to dry.

For the cakes:
  1. Peel and chop the Bramley apples.
  2. Place the chopped apples in a saucepan with two tablespoons of water and half a tablespoon of soft brown sugar.
  3. Cook over a low heat until softened and mostly pureed ( a few small lumps is fine).
  4. Taste and add extra brown sugar as required.
  5. Place to one side to cool.
  6. Preheat oven to 160C.
  7. Line a 12 hole muffin tin with cupcake cases.
  8. In a large mixing bowl, cream the butter and sugar until light and fluffy (this will take at least 5 minutes with an electric hand /stand mixer – don’t rush this stage).
  9. Add the eggs, one at a time, mixing for a few minutes after each addition. It should result in a lovely light mousse-like mixture.
  10. Combine the two flours and the cinnamon in a separate bowl.
  11. Combine the milk and vanilla extract in a jug.
  12. Add one third of the flour mixture to the creamed mixture and stir gently to combine.
  13. Pour in one third of the milk mixture and stir gently.
  14. Continue to add flours and then milk mixture alternately, stirring gently after each addition, until all have been added.
  15. Spoon mixture into the cupcake cases, filling to about 2/3 full.
  16. Bake in the oven for about 30 minutes until lightly golden brown. The cakes will spring back lightly when touched, if cooked.
  17. Remove from the oven and leave to cool in tin for about 10 minutes, before carefully placing on a wire rack to finish cooling.


While the cakes are in the oven, make up the buttercream:
  1. In a large mixing bowl, beat the butter, maple syrup and half of the icing sugar until smooth.
  2. Add the rest of the icing sugar and beat until smooth and creamy.
  3. Add milk (if needed to bring the buttercream to a piping consistency) and beat again.
  4. Put buttercream into a piping bag with a large round nozzle.

Once cakes are cooked and cooled:
  1. Use a tea spoon to cut a cone out from the centre of the cakes.
  2. Cut the top disk off each cone and retain.
  3. Fill the hole in each cake with a teaspoon of pureed apple and then replace a cake disk onto each cake to seal the hole.
  4. Pipe the butter cream into a small flat swirl on each cupcake.
  5. Push the mini marshmallows into the buttercream, leaving space for the heads.
  6. Push the heads into place.  


Monday, 11 November 2013

Bramley apple and custard cake


Apple and custard cake on a cake stand

This week, I’ve been given another big bag of Bramley apples so I’ve been flicking through Pinterest to find some new Bramley apple recipes. Whilst browsing, I found this fab looking cake and followed it through to Cookie’s Cakes and Bakes (CCB) – a lovely baking blog with lots of delicious looking recipes (like her coconut and lime drizzle cake – yum! Will be trying this one out!).  I just love custard but had a bit of a failure when I last tried making a custard cake, however, I couldn’t resist giving this one a go.


It’s not a quick cake to make: firstly you need to make the custard, then the cake, then peel, core and slice the apples before arranging them neatly on top of the cake! However, it is worth the effort! I followed the recipe given by CCB almost exactly; the only thing that I changed was the addition of the apricot jam glaze, which just helped the cake to look that bit more special. 

I love the custard layer running through this cake; the texture of the cake is great and the apples on the top are delicious. However, like last time that I made a custard cake, I found that the custard powder in the actual cake leaves a dry taste in your mouth. I’ll definitely be making this cake again (would be also be fantastic with rhubarb) but next time, I’ll leave out the custard powder and simply up the flour (which is the recipe I have given below).  


Bramley apple and custard cake


Ingredients
  1. 200g soft butter
  2. 110g caster sugar
  3. 2 eggs
  4. 1 tsp vanilla extract
  5. 225g plain flour
  6. 2 tsp baking powder
  7. 2 tablespoons milk (at room temperature)
  8. 3-4 Bramley apples, peeled cored and cut into slices
  9. Demerara sugar for sprinkling over the cake
  10. 2 tblsp apricot jam, warmed and sieved to remove any lumps


For the custard:

  1. 2 tablespoons custard powder
  2. 55g caster sugar
  3. 250ml milk
  4. 20g butter
  5. 2 tsp vanilla extract

Method

  1. Preheat the oven to 180C.
  2. Grease a 20cm deep cake tin and line the bottom of the tin with baking parchment (or simply line with a non-stick cake tin liner – much easier!).
  3. Mix together the custard powder and caster sugar in a saucepan.
  4. Whisk in the milk, stirring over a medium heat until the custard thickens.
  5. Take the custard off the heat and stir in the butter and vanilla extract.
  6. Pour into a bowl, place some clingfilm over the top (making sure that it touches the surface of the custard to prevent it forming a skin) and leave to cool.
  7. Sift the flour and baking powder into a large bowl.
  8. In a separate bowl, cream together the butter and sugar until very light and fluffy (at least 5 minutes in a stand mixer).
  9. Beat in the eggs, one at a time until the mixture is frothy and mousse-like. Add a tablespoon of the flour with each egg to stop the mixture curdling.
  10. Gently stir in remaining flour.
  11. Mix in 2 tablespoons of milk to loosen the batter a little.
  12. Spread half the batter in the cake tin.
  13. Spread the cooled custard all over the batter.
  14. Use a small spatula to carefully spread the remaining batter over the custard, making sure that all the custard is covered with batter.
  15. Place your apple slices over the top of the cake.
  16. Sprinkle Demerara sugar all over the cake.
  17. Bake for 50-60 minutes or until risen and golden. A skewer inserted in the middle of the cake should come out clean.
  18. Allow to cool for 15 minutes and then remove from the tin and place on a wire rack.
  19. Use a pastry brush to brush the top of the cake with the warmed apricot jam.

Saturday, 19 October 2013

Chai latte cupcakes


Chai latte cupcakes piped with violet, pink and cream vanilla buttercream flowers


I’ve recently found Pinterest and have been enjoying flicking through lots of cupcake pictures in search of inspiration. I’d been asked to make cakes for a colleague’s birthday - I’m known for my cupcakes but I wanted to have a go at something a bit more unusual than the standard lemon / orange / red velvet. The idea of chai latte cupcakes caught my interest and so I flicked through a few webpages in search of recipes. There weren’t many UK recipes around and so I decided to make it up, basing it on a Earl Grey recipe in my ever-reliable Cupcakes from the Primrose Bakery book.


I followed the recipe, substituting Earl Grey teabags for chai teabags but also adding in a teaspoon of cinnamon, two-thirds of a teaspoon of cardamom, quarter of a teaspoon of cloves and half a teaspoon of nutmeg. I think this was too much spice! The cakes were very strongly scented and spiced! I was planning to top the cupcakes with a cinnamon buttercream, but as they were rather highly spiced anyway, I decided to balance the flavour a little by topping with a simple vanilla buttercream.


These cupcakes really split opinion – some people loved them (the birthday girl’s husband thought they were the best cakes ever!), while others really weren’t sure. This could be purely down to the chai tea flavour, which is fairly controversial anyway! I love spice but even for me, I found the spicing a bit much. In the recipe below, I have suggested less spice than I used, as this is what I will try next time – the choice is up to you!


I was planning to decorate with something a bit more intricate but I ran out of time (having also made the amazing carrot, pistachio and coconut cake, and mini lemon layer cakes on this day!), so I went for simple piped flowers. To keep it simple, I piped the cream roses first. Then, I added pink food colour to the remaining buttercream and piped the pink flowers. Finally, I added violet food colour to the remaining buttercream and piped the violet flowers. I left the cupcakes for about an hour to allow the buttercream to set and then gave them a quick spray with pearl lustre spray, which gives a fab shiny finish.


People are always amazed by rose swirls on cakes and cupcakes but they are really not that difficult to do. This is a good photo tutorial and there are lots of film clips on YouTube. To be honest, the main things are getting the consistency of the buttercream right, a Wilton 2D piping nozzle, steady pressure on the icing bag and lots of practice! The other flowers were piped very simply with a Wilton 1M piping nozzle – just lots of little stars piped one by one around and on top of each other.


Chai latte cupcakes (single batch of 12 cupcakes)


Ingredients


  1. 175ml semi-skimmed milk, at room temperature
  2. 4 Chai tea bags
  3. 110g butter, at room temperature
  4. 225g golden castor sugar
  5. 2 large eggs
  6. 125g self-raising flour, sifted
  7. 120g plain flour, sifted
  8. ½ tsp cinnamon
  9. ½ tsp mixed spice
  10. ¼ tsp cardamon


Buttercream:


  1. 110g butter, at room temperature
  2. 60ml semi-skimmed milk, at room temperature
  3. 1 tsp vanilla extract
  4. 500g icing sugar, sifted
  5. Food colouring (preferably a paste rather than a liquid)

Method
  1. Heat 125ml milk in a saucepan over a medium heat until it just begins to boil.
  2. Remove from the heat and add the tea bags.
  3. Cover with clingfilm and leave to infuse for about 30 minutes.
  4. Discard the tea bags and add the extra 50ml of milk.   
  5. Preheat oven to 160C/350F/GM4.
  6. Line a 12 hole muffin tin with cupcake cases.
  7. In a large mixing bowl, cream the butter and sugar until light and fluffy (this will take at least 5 minutes with an electric hand mixer – don’t rush this stage).
  8. Add the eggs, one at a time, mixing for a few minutes after each addition. Add a level tablespoon of the plain flour with each egg. It should result in a lovely light mousse-like mixture.
  9. Combine the rest of the plain flour with the self-raising flour and all of the spices in a separate bowl.
  10. Add one third of the flours to the creamed mixture and stir gently to combine.
  11. Pour in one third of the infused milk and stir gently.
  12. Continue to add flours and then milk mixture alternately, stirring gently after each addition, until all have been added.
  13. Spoon mixture into the cupcake cases, filling to about 2/3 full.
  14. Bake in the oven for about 30 minutes until lightly golden brown. The cakes will spring back lightly when touched, if cooked.
  15. Remove from the oven and leave to cool in tin for about 10 minutes, before carefully placing on a wire rack to finish cooling.


While the cakes are in the oven, make up the buttercream:

  1. In a large mixing bowl, beat the butter, milk, vanilla extract and half of the icing sugar until smooth.
  2. Add the rest of the icing sugar and beat until smooth and creamy.

Monday, 7 October 2013

Mini Victoria sponge cakes

Mini Victoria sponge filled with vanilla buttercream and raspberry jam, topped with a fresh raspberry
A friend recently asked me for a standard, reliable Victoria sponge recipe and, checking through the blog, I realised that I haven’t written up the recipe that I generally use. My sponge cake is a bit of an amalgam of various recipes – picking up ideas from different people and traditions! 

Rather than just writing up the recipe, I thought I had better give it a run out and this seemed like an excellent opportunity to use this year’s favourite baking tin: the Lakeland mini sandwich tin. However, I didn’t really think too much about quantities and so made the standard quantity for a two layer Victoria sponge – half of this would have been plenty for the tin! Therefore, I ended up popping the spare mixture into cupcake cases to make Victoria sponge cupcakes.

This recipe makes a beautifully light and fluffy sponge cake – it can be made as a quick all-in-one cake in the food processor but I haven’t tried this! My food processor is too small and I’m a bit of a traditionalist! A few tips to ensure that your sponge is light and fluffy:

  • Make sure that all of your ingredients are at room temperature
  • Beat the butter and sugar for at least 5 minutes (with a stand / electric mixer, longer if by hand!)
  • Beat for at least 2 minutes after adding each egg, preferably more!
  • Fold the flour in carefully – do not beat at this stage, as this activates the gluten in the flour and will make your cake tough.
  • Add enough milk to create a smooth, soft mixture that drops off a spoon in smooth lumps – not so much that it runs off.

What you choose to fill it with is completely up to you! Traditionalists will argue whether a Victoria sponge is filled with jam / jam and cream and will tell you that it should not have a topping but merely dusted with icing/castor sugar. Personally, I love raspberry jam and whipped double cream as a filling, but this does require keeping the cake in the fridge if you are not serving immediately. On this occasion, I decided to fill with jam and vanilla buttercream. If you don’t make your own jam (I don’t!), I would strongly recommend mashing up raspberries and adding these to shop-bought jam – this adds a real zing and liveliness to the filling.

The cupcakes were very different to my standard vanilla cupcakes: these were very light and fluffy – almost melting to nothing in your mouth! The ones I generally make are a little denser and richer – I guess it is very much down to personal preference! I filled these with raspberry jam and topped with vanilla buttercream.

Victoria sponge cake
Ingredients
(for two 21cm sandwich tins, halve ingredients to fill the mini sandwich tin or to make 12 cupcakes)


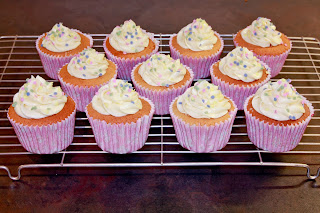
    Victoria sponge cupcake filled with raspberry jam and topped with a swirl of vanilla buttercream and polka dot sprinkles
  1. 4 large eggs – weighed
  2. Equal weight of butter
  3. Equal weight of golden castor sugar
  4. Equal weight minus 30g of self-raising flour
  5. 30g cornflour
  6. 1 tsp baking powder
  7. 1-2 tsp good quality vanilla extract
  8. 3-4 tblsp milk (at room temperature) 

To fill and top
Vanilla buttercream:

  1. 115g butter, at room temperature
  2. 500g icing sugar, sifted
  3. 60ml milk (at room temperature)
  4. 1 tsp vanilla extract
  1. 4 tablespoons raspberry jam
  2. 1 punnet raspberries
Method
  1. Preheat the oven to 165C.
  2. Grease your chosen baking tins. Wilton’s cake release spray is fantastic!
  3. Cream the butter and the sugar – beating for at least 5 minutes with a stand / electric mixer, until the mix is pale and fluffy.
  4. Add the vanilla extract.
  5. Add the eggs one at a time and beat for at least 2 minutes after each addition. Add a spoonful of flour with each egg to prevent curdling.
  6. Gently fold in the rest of the flour, cornflour and baking powder.
  7. Add in milk, a little at a time, until you reach a soft, dropping consistency.
  8. Spoon evenly into your chosen tin.
  9. Bake in pre-heated oven for 20-25 minutes. The cake should be lightly golden, slightly pulling away from the edge of the tin and springy when gently touched.
  10. Remove from oven and place on a wire cooling rack.
  11. Leave to cool for 15 minutes and then remove from tins.
  12. Cool on a wire rack.
To fill and top:

  1. In a large mixing bowl, beat the butter, 30ml milk, vanilla extract and half of the icing sugar until smooth.
  2. Add the rest of the icing sugar and beat.
  3. Add the remaining milk as needed to reach a smooth, creamy texture.
  4. Mash half of the raspberries with a fork and stir into the jam.
  5. Spread or pipe some of the buttercream onto one half of the sandwich cake.
  6. Spoon jam on top of the buttercream.
  7. Gently place the second cake on top of the first.
  8. Top with piped buttercream and the remaining raspberries.
11 Victoria sponge cupcakes filled with raspberry jam and topped with a swirl of vanilla buttercream and polka dot sprinkles


Sunday, 18 August 2013

Rhubarb and marzipan crumble cake


Rhubarb and marzipan crumble cake on a cake stand
It’s been over a month since I last wrote a post! To be honest, I haven’t baked much until recently – I was away for much of July and the hot weather meant that it was just too hot to be stuck in the kitchen with the oven going! However, the gorgeous July weather also meant that my rhubarb kept on growing and I did need to bake something to use it up again!


Having not been particularly impressed with the rhubarb and custard cake I made last time, I decided to have a go at a different rhubarb recipe this time: rhubarb and marzipan crumble cake. I found this recipe recommended online and the only change that I made was the addition of the chopped hazelnuts. I love the crunch and the flavour that chopped hazelnuts give to the crumble mixture on my rhubarb crumble muffins and so decided that they would also be a great addition to this recipe.


This recipe is a definite hit! When making, there seemed to be an imbalance between the relatively small amount of cake, reasonable amount of rhubarb and huge amount of crumble, however, once baked, it turned out beautifully. The cake is deliciously moist and fairly tart and the crumble on top is crunchy and sweet. I took this cake into work and it went down a storm! Definitely one that I will be making again!

Update August 2014
Made this delicious cake again last week and I added 15 drops of Lakeland custard flavouring, which added a delicious sweetness to the cake. The cake took a very long time to cook and was very moist still in the middle. I think that the rhubarb gave out too much juice while cooking and so it would probably be a good idea to draw out some of the juices first. I have adapted the recipe below to suggest this. 


Rhubarb and marzipan crumble cake

Ingredients

    Slice of rhubarb and marzipan crumble cake
  1. 150g plain flour
  2. 125g butter
  3. 25g light muscovado sugar
  4. 40g chopped hazelnuts
  5. 100g marzipan, coarsely grated
  6. 100g golden caster sugar
  7. 2 free range medium eggs
  8. 1tsp baking powder
  9. 400g rhubarb, washed & sliced
  10. 15 drops custard flavouring (optional)
  11. Custard or clotted cream to serve

Method

  1. Place the chopped rhubarb in a bowl and coat with 25g caster sugar. 
  2. Preheat the oven to 190C.
  3. Grease and base line a 20cm deep, loose bottomed cake tin.
  4. Prepare the crumble topping: sift half the flour into a bowl and rub in 50g of the butter. Stir in the muscovado sugar, hazelnuts and the marzipan, then set aside.
  5. Cream the remaining 75g butter with 75g of the caster sugar until pale.
  6. Beat in the eggs, one at a time.
  7. Sift in the remaining 75g flour with the baking powder and fold in quickly to form a soft batter.
  8. Spoon into the prepared cake tin, and spread level.
  9. Tip the rhubarb into a sieve to drain away any juices and then scatter the rhubarb onto the creamed mixture.
  10. Sprinkle the crumble on top to cover.
  11. Bake for 45 minutes, until the top is golden and springy.
  12. Allow the cake to cool for 10 minutes and then remove from the tin.
  13. Serve slices warm or cold with custard or clotted cream.