Monday, 7 October 2013

Blackberry and apple crumble


2 blackberry and apple crumbles in tin foil containers
Just a quick post to type up my blackberry and apple crumble recipe. For me, blackberry and apple crumble is an autumn must! Having made blackberry and almond crumble squares with some of our foraged blackberry haul, next on the list was proper crumble. I love the combination of blackberry and apple, and crumble is just so easy to make.


My crumble isn’t actually the traditional flour, butter, sugar combination, I follow a recipe from The Good Granny Cookbook, which uses oats rather than flour in the topping and so is more like a chewy, crunchy flapjack on top – delicious! By cooking the fruit in a saucepan first and then reducing the juices, you intensify the flavour and prevent the top from becoming soggy.  The great thing about crumble is that there really aren’t any rules – I tend to throw in a bit of spice and whatever nuts that I have in the cupboard!


As I was visiting a friend who has just had a baby, I split the crumble into two disposable tin foil containers: one for them and one for us! These are great: you can pop them in the oven to bake and once cool, pop the cover on and put them in the freezer. Then, when you want to eat, just pop them straight back in the oven to re-heat.   


Blackberry and apple crumble


Ingredients

  1. 700g mix of Bramley apples (peeled, cored and diced) and blackberries (I used 400g blackberries, 300g apple)
  2. 60g soft brown sugar
  3. 85g golden syrup
  4. 85g butter
  5. 175g oats
  6. 60g hazelnuts / walnuts
  7. 1.5 tsp cinnamon
Method
  1. Pre-heat the oven to 175C.
  2. Put the fruit in a saucepan with the sugar and enough water to cover the base of the pan.
  3. Cook gently until the fruit are soft and the juices running.
  4. Taste to check the sweetness – stir through more sugar if needed.
  5. Strain off the juice.
  6. Put the fruit into the pie dish / foil containers.
  7. Return the juice to the saucepan and boil rapidly until reduced and syrupy.
  8. Pour the juice over the fruit.
  9. Melt the golden syrup and the butter together (easiest done in a microwave).
  10. Mix the oats, nuts and spice into the syrup/butter mixture.
  11. Spread the mixture gently over the fruit.
  12. Bake in the oven for 20-30 minutes until the top is lightly browned.  

Mini Victoria sponge cakes

Mini Victoria sponge filled with vanilla buttercream and raspberry jam, topped with a fresh raspberry
A friend recently asked me for a standard, reliable Victoria sponge recipe and, checking through the blog, I realised that I haven’t written up the recipe that I generally use. My sponge cake is a bit of an amalgam of various recipes – picking up ideas from different people and traditions! 

Rather than just writing up the recipe, I thought I had better give it a run out and this seemed like an excellent opportunity to use this year’s favourite baking tin: the Lakeland mini sandwich tin. However, I didn’t really think too much about quantities and so made the standard quantity for a two layer Victoria sponge – half of this would have been plenty for the tin! Therefore, I ended up popping the spare mixture into cupcake cases to make Victoria sponge cupcakes.

This recipe makes a beautifully light and fluffy sponge cake – it can be made as a quick all-in-one cake in the food processor but I haven’t tried this! My food processor is too small and I’m a bit of a traditionalist! A few tips to ensure that your sponge is light and fluffy:

  • Make sure that all of your ingredients are at room temperature
  • Beat the butter and sugar for at least 5 minutes (with a stand / electric mixer, longer if by hand!)
  • Beat for at least 2 minutes after adding each egg, preferably more!
  • Fold the flour in carefully – do not beat at this stage, as this activates the gluten in the flour and will make your cake tough.
  • Add enough milk to create a smooth, soft mixture that drops off a spoon in smooth lumps – not so much that it runs off.

What you choose to fill it with is completely up to you! Traditionalists will argue whether a Victoria sponge is filled with jam / jam and cream and will tell you that it should not have a topping but merely dusted with icing/castor sugar. Personally, I love raspberry jam and whipped double cream as a filling, but this does require keeping the cake in the fridge if you are not serving immediately. On this occasion, I decided to fill with jam and vanilla buttercream. If you don’t make your own jam (I don’t!), I would strongly recommend mashing up raspberries and adding these to shop-bought jam – this adds a real zing and liveliness to the filling.

The cupcakes were very different to my standard vanilla cupcakes: these were very light and fluffy – almost melting to nothing in your mouth! The ones I generally make are a little denser and richer – I guess it is very much down to personal preference! I filled these with raspberry jam and topped with vanilla buttercream.

Victoria sponge cake
Ingredients
(for two 21cm sandwich tins, halve ingredients to fill the mini sandwich tin or to make 12 cupcakes)


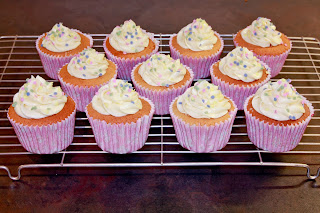
    Victoria sponge cupcake filled with raspberry jam and topped with a swirl of vanilla buttercream and polka dot sprinkles
  1. 4 large eggs – weighed
  2. Equal weight of butter
  3. Equal weight of golden castor sugar
  4. Equal weight minus 30g of self-raising flour
  5. 30g cornflour
  6. 1 tsp baking powder
  7. 1-2 tsp good quality vanilla extract
  8. 3-4 tblsp milk (at room temperature) 

To fill and top
Vanilla buttercream:

  1. 115g butter, at room temperature
  2. 500g icing sugar, sifted
  3. 60ml milk (at room temperature)
  4. 1 tsp vanilla extract
  1. 4 tablespoons raspberry jam
  2. 1 punnet raspberries
Method
  1. Preheat the oven to 165C.
  2. Grease your chosen baking tins. Wilton’s cake release spray is fantastic!
  3. Cream the butter and the sugar – beating for at least 5 minutes with a stand / electric mixer, until the mix is pale and fluffy.
  4. Add the vanilla extract.
  5. Add the eggs one at a time and beat for at least 2 minutes after each addition. Add a spoonful of flour with each egg to prevent curdling.
  6. Gently fold in the rest of the flour, cornflour and baking powder.
  7. Add in milk, a little at a time, until you reach a soft, dropping consistency.
  8. Spoon evenly into your chosen tin.
  9. Bake in pre-heated oven for 20-25 minutes. The cake should be lightly golden, slightly pulling away from the edge of the tin and springy when gently touched.
  10. Remove from oven and place on a wire cooling rack.
  11. Leave to cool for 15 minutes and then remove from tins.
  12. Cool on a wire rack.
To fill and top:

  1. In a large mixing bowl, beat the butter, 30ml milk, vanilla extract and half of the icing sugar until smooth.
  2. Add the rest of the icing sugar and beat.
  3. Add the remaining milk as needed to reach a smooth, creamy texture.
  4. Mash half of the raspberries with a fork and stir into the jam.
  5. Spread or pipe some of the buttercream onto one half of the sandwich cake.
  6. Spoon jam on top of the buttercream.
  7. Gently place the second cake on top of the first.
  8. Top with piped buttercream and the remaining raspberries.
11 Victoria sponge cupcakes filled with raspberry jam and topped with a swirl of vanilla buttercream and polka dot sprinkles


Sunday, 6 October 2013

Carrot, pistachio and coconut cake (gluten-free)

Carrot pistachio and coconut cake (gluten free) with an orange blossom drizzle icing and topped with chopped pistachios and orange zest
Flicking through this month’s Good Food magazine, this cake caught my eye. A few friends and colleagues are coeliac and so I’m always on the look-out for good gluten-free recipes: this one looked really unusual and tasty.


Having decided to make this, and made sure that I had all the ingredients, I realised that I don’t own the 24cm cake tin that the recipe demanded. I decided to go with it anyway and split the mixture between 2 20cm sandwich tins. The cakes were obviously smaller and a little thinner than the original, but generally completely fine.


This cake was lovely and easy to make – a quick blitz in the stand mixer to froth up the eggs and sugar and then gradually add in the rest of the ingredients. It did take much longer than the suggested hour to cook though – I think it took about an hour and a half in the end, but my oven always bakes slowly so I have suggested 1 hour 15 minutes.


The Good Food recipe suggested serving the cake with rose scented double cream. However, I was taking this into work and so wanted to pretty it up a bit! I decided to flavour my icing with orange blossom water as I felt that it would complement the other flavours, but you could also use rose water and then top with crystallised rose petals rather than the orange zest – which could look really pretty.


I loved this cake! It was really unusual and had a lovely flavour and moist texture. I love the flavour of coconut but I’m not usually sure about desiccated coconut as the texture can be a bit dry and claggy. However, the rest of this cake was so moist that this was not a problem. I’ll definitely be making this again!


Carrot, pistachio and coconut cake

Ingredients

  1. 3 large eggs
  2. 200g golden castor sugar
  3. 2 tsp vanilla extract
  4. 200g ground almonds
  5. 100g desiccated coconut
  6. 2 tsp ground cinnamon
  7. 140g butter, melted
  8. 2 large carrots, grated
  9. 100g pistachios, roughly chopped or pulsed in a mini processor

To ice:

  1. 1 - 2 tsp orange blossom water
  2. 100g icing sugar
  3. Zest of one orange
  4. Chopped pistachios

Or serve with:

  1. 300ml double cream
  2. 2 tblsp icing sugar
  3. A few drops of rose water

Method

  1. Pre-heat the oven to 160C.
  2. Line one 24cm cake tin, or 2 20cm cake tins.
  3. Beat the eggs, sugar and vanilla extract in a stand mixer until frothy.
  4. Stir in the ground almonds, coconut and cinnamon.
  5. Stir in the melted butter.
  6. Add the grated carrots and pistachios and stir until all ingredients are evenly combined.
  7. Pour the mixture into the tin/s and place in pre-heated oven.
  8. Bake for approximately 1 hr 15 minutes (check after an hour), or until cake is firm and golden on top.
  9. Remove from oven and place on a wire rack to cool in the tin for at least 4 hours.

To ice

  1. When cool, mix the orange blossom water with the icing sugar.
  2. Add extra water until the icing is smooth and pipeable.
  3. Place the icing in a piping bag and drizzle over the cake.
  4. Scatter over the chopped pistachios and the orange zest. 

Or to serve with scented cream:

  1. Tip the cream, icing sugar and rose water into a mixing bowl.
  2. Whisk to soft peaks. 

Blackberry and almond crumble squares


3 blackberry and almond crumble squares
Much as I love summer, autumn can also be a fantastic season: beautiful colours and lots of fantastic autumnal fruit ready to be harvested. For me, one of autumn’s greatest pleasures is blackberrying: it’s something that we did as a family, scrambling around the cliffs of Guernsey, eating more blackberries than actually made it into the tubs!  This year seems to have been a bumper year for blackberries and so EHH and I spent a fab afternoon on the outskirts of Bath, clambering into the middle of bramble bushes in search of big juicy berries.


We returned home with a good haul of blackberries and so the next decision was what to make with them! Blackberry and apple crumble was an absolute must but I also fancied making a cake. I’ve made a few crumble cakes recently (rhubarb and marzipan crumble cake; raspberry and apple crumble squares) but wanted to make something new. I was planning to visit a friend who has just had a baby so the oats in this Good Food recipe seemed like a good idea.


The original recipe was blackberry and coconut but I’m generally not sure about dessicated coconut in a cake as it can be rather dry, so I decided to substitute the coconut with ground almonds. I also upped the quantity of oats (and lowered the flour accordingly) and added the additional grated marzipan (this gives fantastic crunch and sweetness to the crumble topping) and chopped hazelnuts (just because I love the nutty flavour and crunchy texture that these add).


This cake was simple to make but I was a little worried that the mix that went in the oven was rather dry and not at all like a typical cake! Don’t be concerned by this – it works out just fine! Judging when the cake is cooked is probably the trickiest part: the crumble topping means that you can’t test the springy-ness of the cake. You will need to test the cake with a metal skewer: the cake will be cooked when the skewer comes out clean, with no sticky cake mixture attached. Make sure that you test in several parts of the cake. On this occasion, I forgot to use my magi-cake strips, which meant that the cake was slightly over-baked at the edge – must remember these next time!


This isn’t a light and fluffy cake: the texture is something between a cake and a flapjack; it's possible that this is due to the addition of ground almonds rather than coconut. The blackberries add a nice sharp flavour contract to the oatiness of the cake. These cakes aren’t particularly sweet – they’d actually work quite well as a tasty and filling oaty breakfast snack. It would work well as a dessert with custard and some more berries, or if I were to serve for afternoon tea, it would be nice served with clotted cream and berries. On the day of baking, the crumble topping was fantastic – crunchy and crumbly with lots of flavour. Unfortunately, after a day, it lost most of its crunch as the moisture from the blackberries seeped up into the topping. However, although they weren’t as good as they were on the day due to the loss of the contrast in textures, these cakes did last well for over a week. 


I think if I were to make these again, I’d consider adding more fruit – possibly a couple of sliced Granny Smith apples. Having recently made a fantastic carrot, pistachio and coconut cake, I’ve been swayed in my opinion about dessicated coconut and would like to give it a go in this cake.


Blackberry and almond crumble cake

Ingredients
Blackberry crumble cake cooling on a wire rack before cutting
Cooling on the rack

  1. 200g self-raising flour
  2. 75g oats
  3. 280g soft brown sugar
  4. 200g cold butter, cut into pieces
  5. 75g ground almonds / desiccated coconut
  6. 75g grated marzipan (optional)
  7. 30g chopped hazelnuts
  8. 2 medium eggs, beaten
  9. 350g frozen or fresh blackberries

Method

  1. Heat oven to 180C.
  2. Line a rectangular brownie tin (31 x 17cm), or a 21cm square tin.
  3. Tip the flour, oats and sugar into a large bowl. Rub the butter into the flour mixture using your fingertips until only small pea-size pieces remain.
  4. Stir through the coconut/almonds.
  5. Fill a teacup with this mixture and set this aside.
  6. Stir the eggs into the remaining bowl of mixture and mix until evenly combined.
  7. Spread over the bottom of the lined baking tin, smoothing the surface with the back of a spoon
  8. Scatter over the blackberries.
  9. Scatter over the reserved teacup mixture of crumble.
  10. Scatter over the grated marzipan and chopped hazelnuts.
  11. Place in oven and bake for 1 hr-1 hr 15 mins until golden and cooked through (if you poke a skewer in, it should come out with moist crumbs but no wet mixture). 
  12. Leave to cool, then remove from the tin and cut into squares.

Sunday, 22 September 2013

Honeybread biscuits with Sark wildflower honey

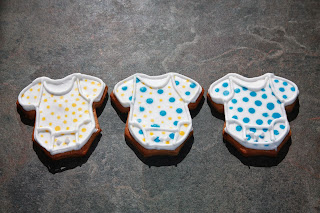
3 baby onesie cookies


One of my closest friends has recently had a beautiful baby boy and so I decided to bake up some goodies to help her through those sleep-deprived first weeks. I’ve had a set of new baby cookie cutters in the cupboard for ages and I’d seen this recipe in my most recent Good Food magazine (cut out into very cute bee shapes!) so I decided to give it a go. I had a jar of very special Sark wildflower honey from a recent weekend on the beautiful island of Sark in the Channel Islands and so decided to use it for this recipe.


Making these biscuits is actually very easy – just stick all the ingredients in a food processor and whizz! The original recipe suggested that you could roll and cut the dough straight away – I decided to stick with the Biscuiteers’ method of popping them in the fridge first. To be honest, I’m not sure if this is necessary!


The original recipe just suggested plain icing, but I added lemon juice and a touch of orange blossom water to add a bit of interest and echo the floral flavours of the honey.


However, icing these was not simple! I must remember when I next make biscuits that I should not attempt to ice with more than 2 or 3 colours! Mixing up lots of different colours of line and flooding icing takes ages! And icing biscuits generally takes quite a while! In the end, these weren’t quite as neat as I’d have liked because I had to hurry to get them finished!


Overall, these biscuits were nice and spicy and the honey flavour came through well in the background. I’m not sure that I would worry about putting in really good quality honey next time, as I think that the other flavours meant that the quality of the honey was not really noticeable. I really did like the extra flavour that the lemon and orange flower water gave to the icing.   


Honeybread biscuits with Sark wildflower honey

Makes approximately 20-25 biscuits


3 teddy bear cookiesIngredients

  1. 300g plain flour
  2. 100g diced butter
  3. 1 tblsp mixed spice
  4. 2 tsp ground ginger
  5. 100g light brown soft sugar
  6. 1 large egg
  7. 100g clear honey


To decorate

  1. 500g royal icing sugar
  2. 75ml lemon juice or water
  3. Couple of drops of orange blossom water (optional)


Method

  1. Place all the biscuit ingredients into a food processor and whizz to a smooth dough.
  2. Split the dough in half.
  3. Place half of the dough between two sheets of baking parchment and roll out to the thickness of a £1 coin. Place in the fridge for 20 minutes.
  4. Repeat with the second half of the dough.
  5. Pre-heat oven to 180C.
  6. Remove dough from fridge, stamp out shapes using chosen cutters and place on a baking tray.
  7. Bake for about 10-12 minutes until crisp and golden brown.
  8. Place on a wire rack to cool.


To ice

  1. Add the water to the royal icing sugar in a large bowl.
  2. Stir with a wooden spoon until combined (this stops your kitchen being coated in a fine dusting of icing!)
  3. Use an electric mixer to beat the mix (starting on low and increasing to high speed) for about 5 minutes. You are looking for the mix to be bright white and a toothpaste-like consistency (this is “line icing”).
  4. Divide the line icing between smaller bowls.
  5. Use a skewer to add small amounts of the paste colours to the bowls of icing, adding a little at a time until you reach the desired colour. 
  6. Spoon some of the icing into a piping bag with a very small round tip.
  7. Pipe the outlines of the shapes. Set aside the rest of the line icing to add details to the iced biscuits.
  8. Add water/more juice to the icing left in the bowls until you reach a pouring consistency (this is called “flooding icing”).
  9. Spoon into a piping bag or piping bottle.
  10. Pipe the flooding icing onto the biscuits to fill the areas outlined on the biscuits.
  11. Allow iced biscuits to set.
  12. Use remaining line icing and other decorative items to complete the decoration of the biscuits.
  13. Leave to dry for at least 24 hours.